
This installation uses Windows Subsystem for Linux (WSL), allowing you to run an Ubuntu environment without having to install an entirely new operating system.
Installation
Preparations
Windows Info: OS Build Number
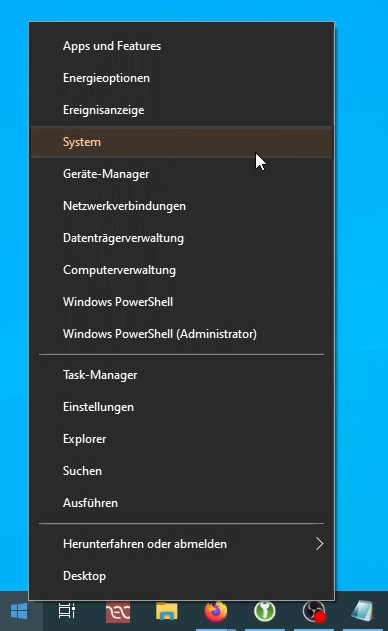
First, you need to verify that your Windows installation is up to date. To do this, right-click on the Windows icon in the taskbar, then left-click on System.
In the list on the left-hand side, the last item is labeled About (this should already be selected). You can find the corresponding number listed next to the entry OS build.
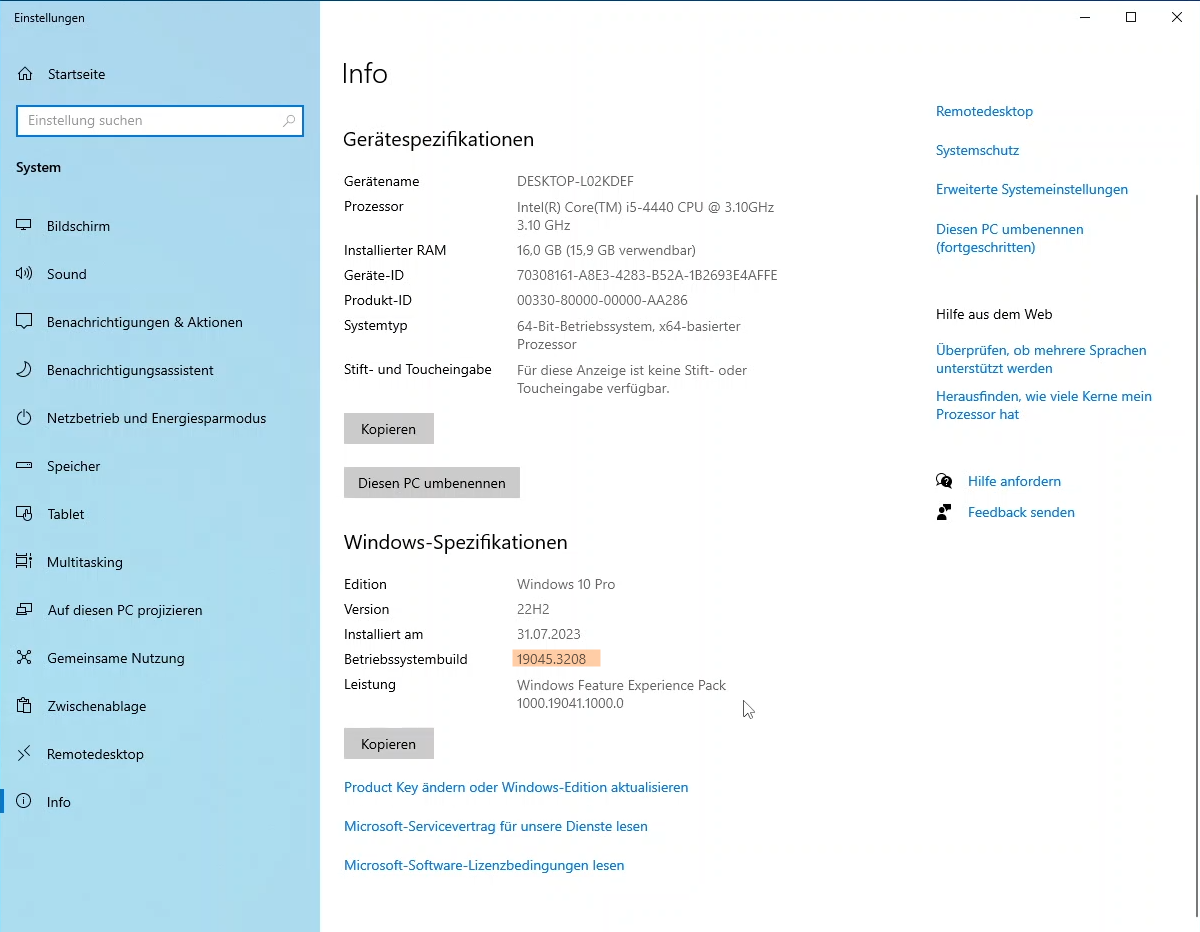
The installation of WSL has been significantly simplified compared to previous years. To take advantage of these changes, the number before the . must be at least 19041.
If your number is lower than this, we recommend that you install updates for your Windows installation. To do so, use the search bar within the About window shown above to search for Update and then select the option Check for updates.
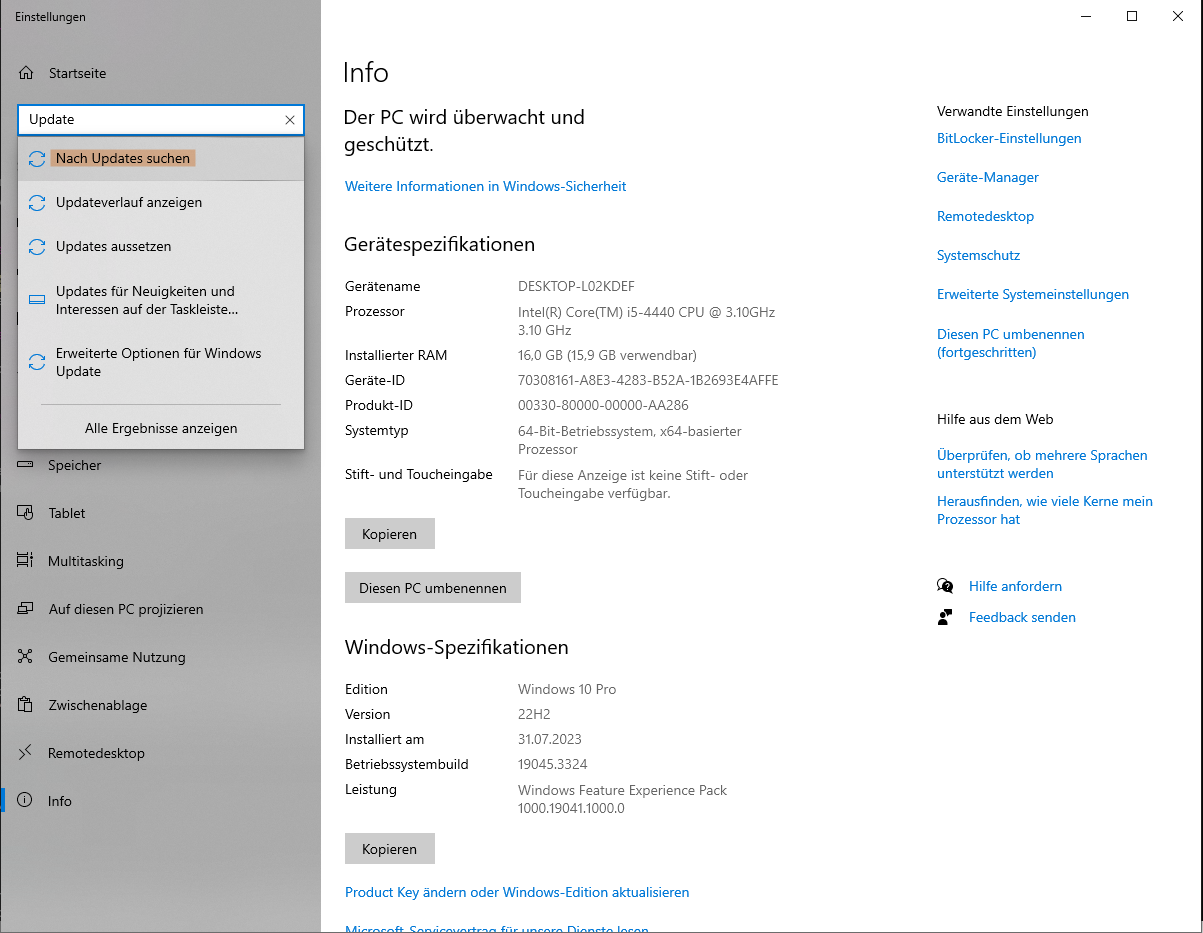
You can then install any missing updates by clicking the Check for updates button.
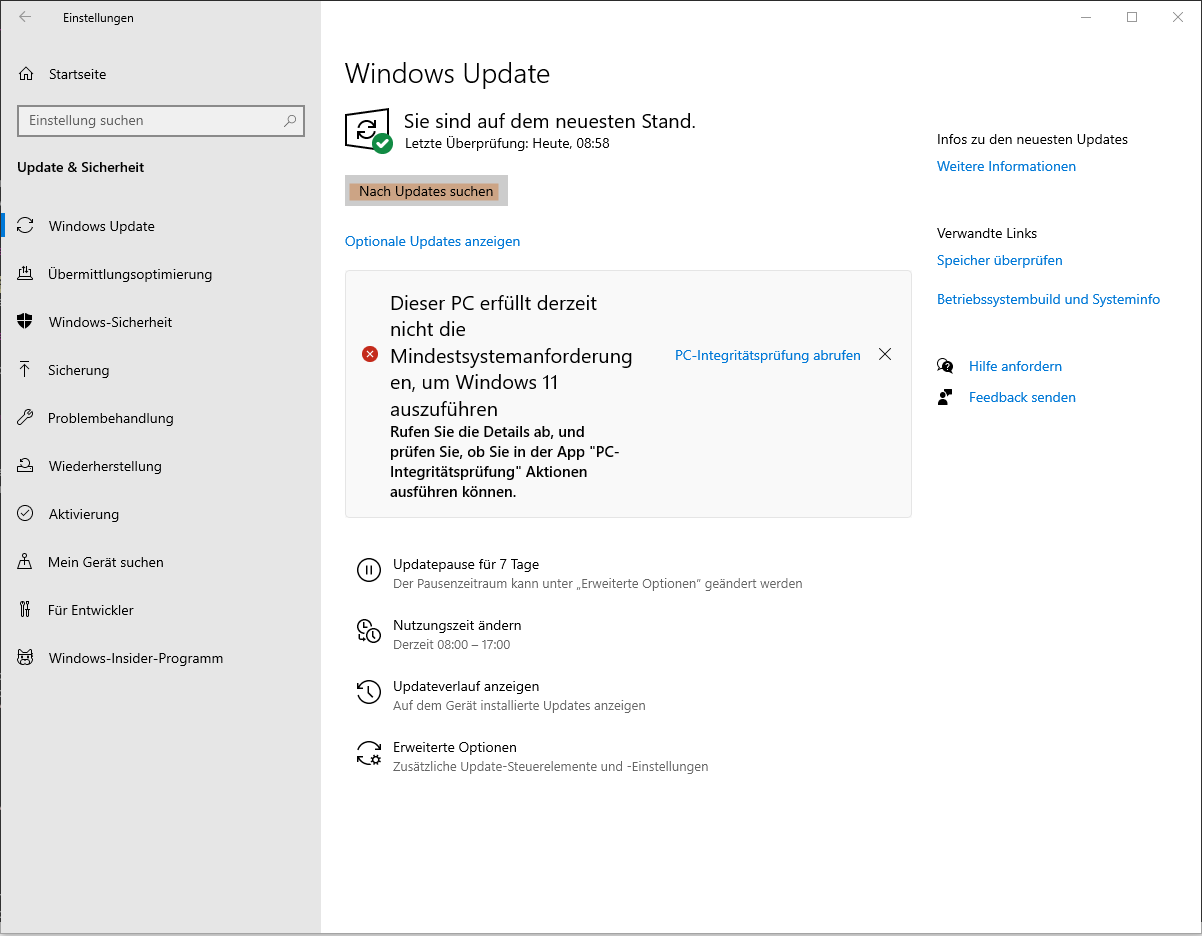
After installing the updates and restarting your PC, check the OS build number once more. If it still does not meet the requirements, please contact us.
Enabling File Extensions
File extensions (which indicate the file type, e.g., .pdf for PDF documents) are not enabled by default in Windows. They can and should be enabled.
You can adjust this setting in File Explorer. The easiest way to open it is by using the keyboard shortcut Windows + e (Windows refers to the Windows logo key, located between Ctrl and Alt in the bottom-left corner of your keyboard).
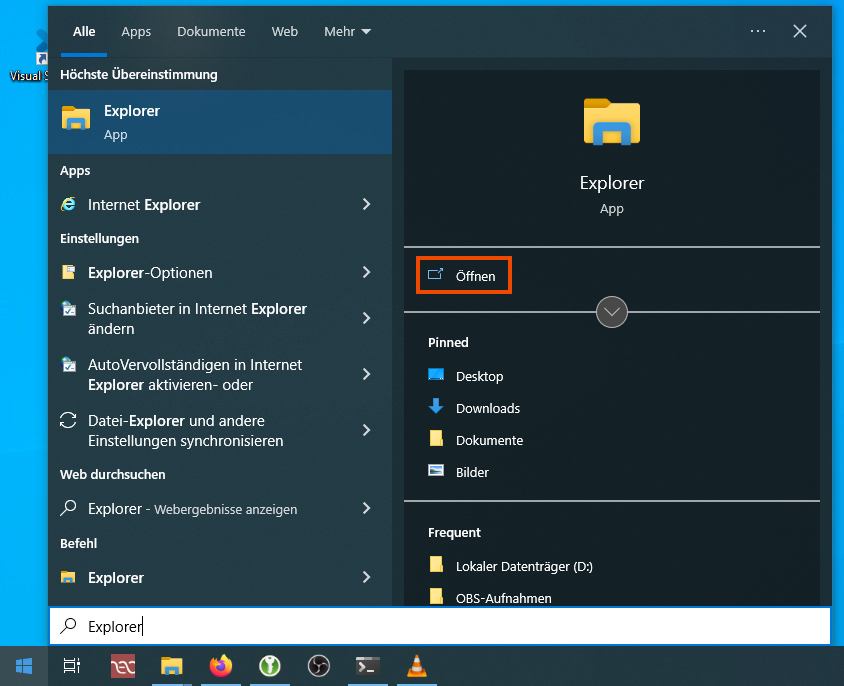
Alternatively, you can open File Explorer by searching it in the Start menu. After opening the Start menu, a search is automatically initiated when you type characters on the keyboard. Here, you need to enter Explorer. You can then open an Explorer window by clicking on Open.
In the top row, is the View tab. Here, the checkbox for File name extensions must be ticked (a black checkmark should be visible inside the box).

Windows Subsystem for Linux (WSL)
These instructions work only with the corresponding operating system build number; see section Preparations.
Installing WSL
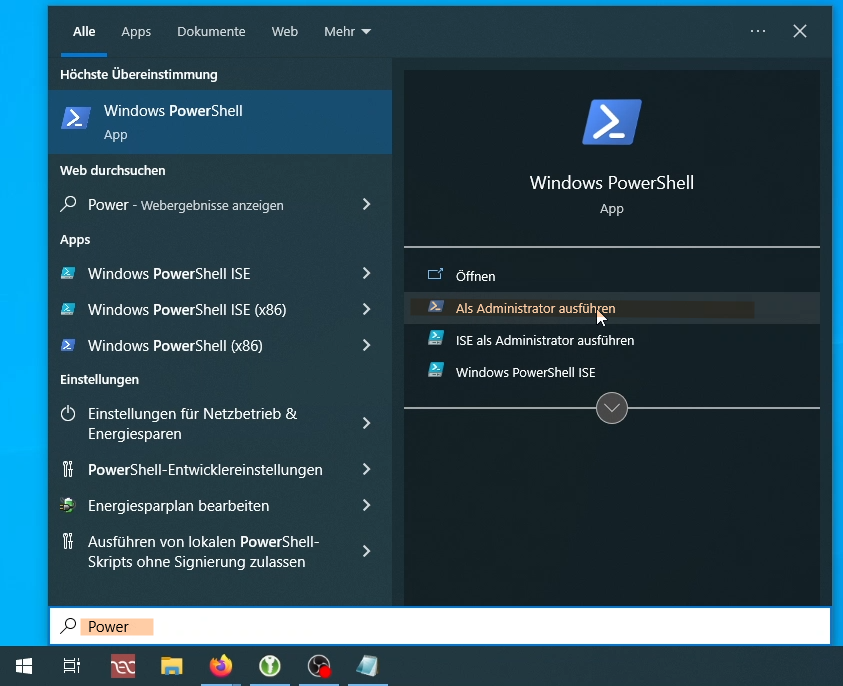
Next, launch a PowerShell console as an administrator. One way to do this is by opening the Windows Start menu. Typing Power on your keyboard will automatically initiate a search. On the right side of the search window, click Run as administrator.
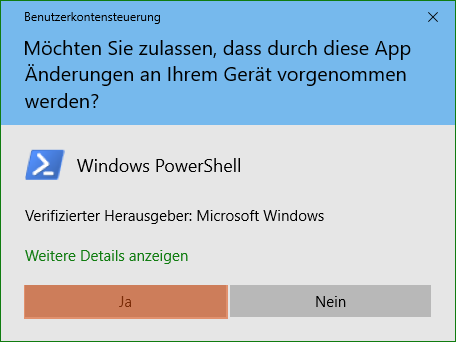
In most cases, the following window will appear. Confirm this by clicking Yes. These security prompts may appear again later in the process; confirm them with Yes. There are no issues if this window does not appear.
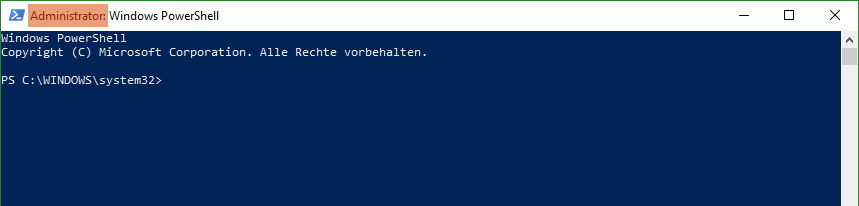
A window will now open, as shown below; this is the PowerShell console. To ensure that PowerShell has been opened with administrator privileges, you can check the window title; it must begin with Administrator:
Enter the following command into PowerShell. You can also copy and paste this command; in PowerShell, pasting is performed with right-clicking.
wsl --install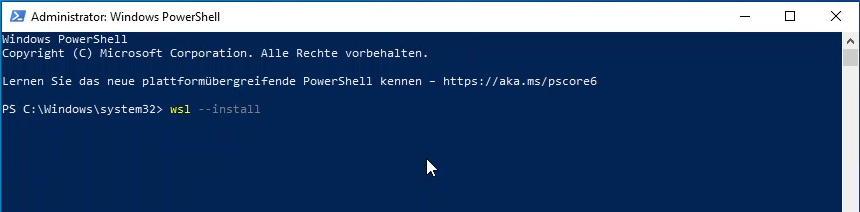
Press the Enter key to confirm your input.
This installation may take a few minutes; during this time, several stylized progress bars will be displayed. Upon successful completion of this process, the output will appear as follows:
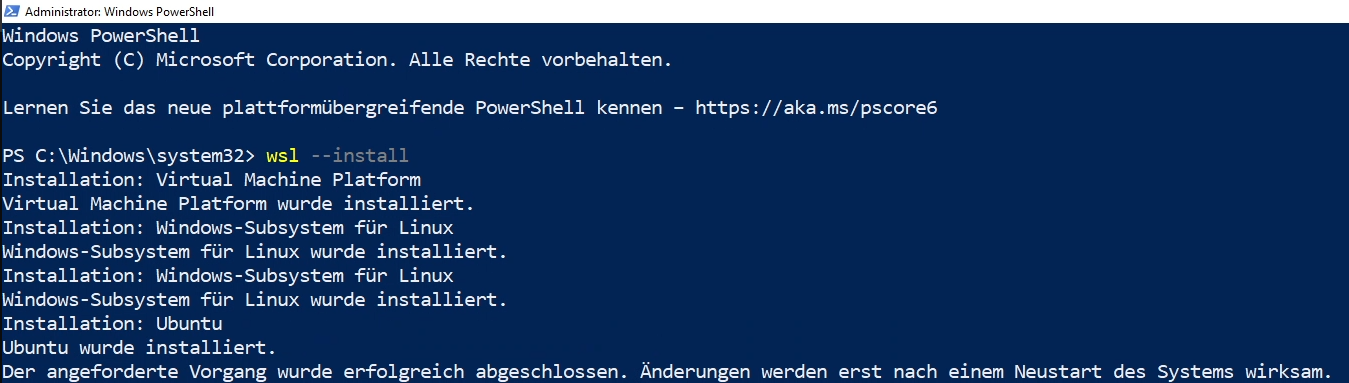
As indicated in the final line, your PC must now be restarted.
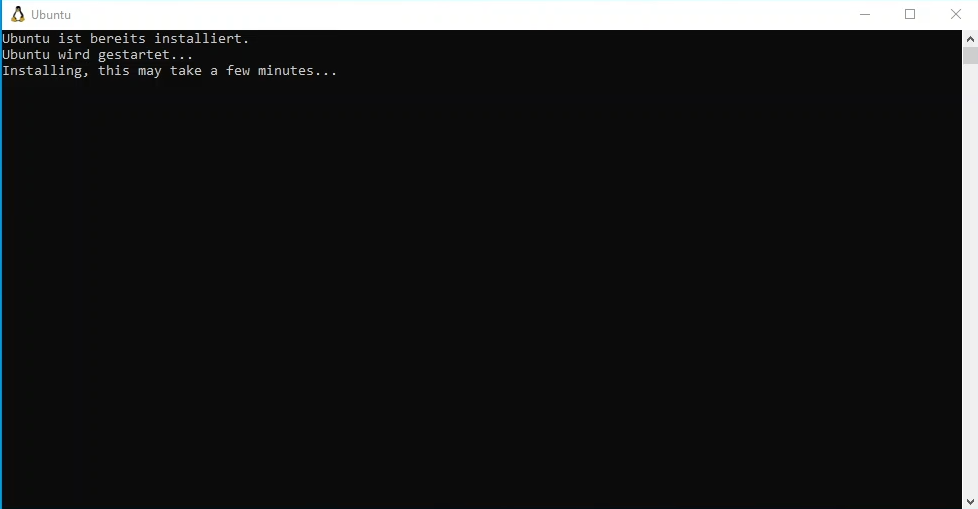
After the restart, the following window should open automatically, allowing you to complete the WSL installation by setting up your user account.
Setting Up a User Account
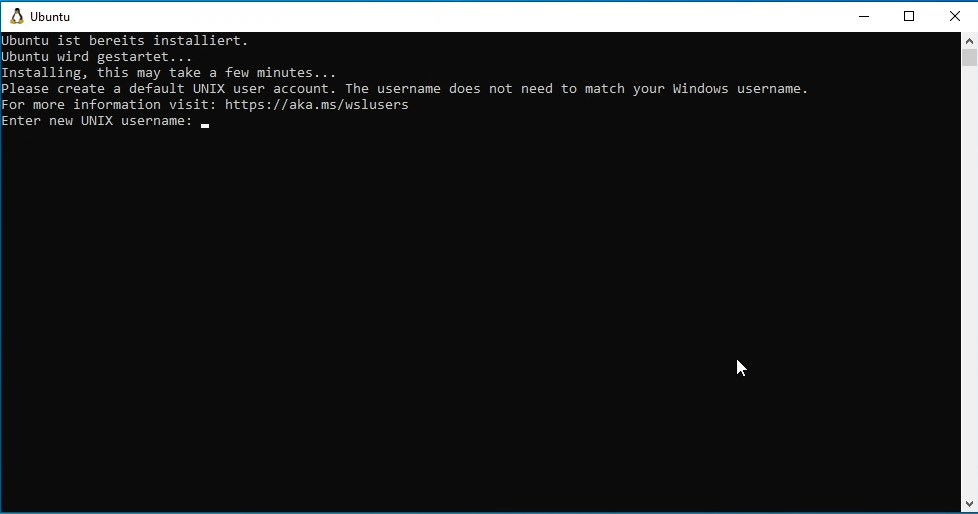
Following a successful installation, you will be prompted to enter a username for the Linux operating system. Your Linux username may, but does not have to, match your Windows username.
Confirm your username by pressing the Enter key.
Next, you will be asked to provide a password for the Linux operating system. For security reasons, the password you enter will not be displayed. Confirm your password by pressing the Enter key. You will then be required to enter the password a second time to ensure there are no typos. Confirm this entry as well by pressing the Enter key.
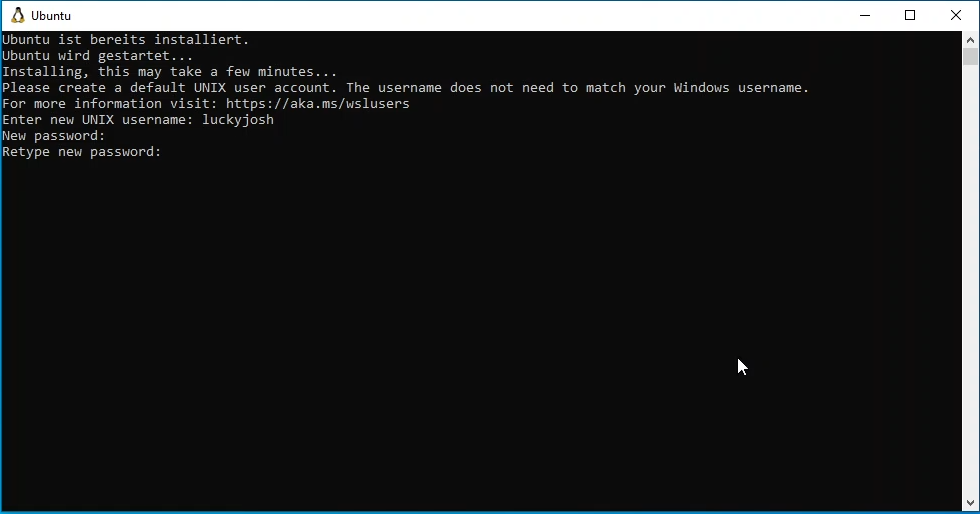
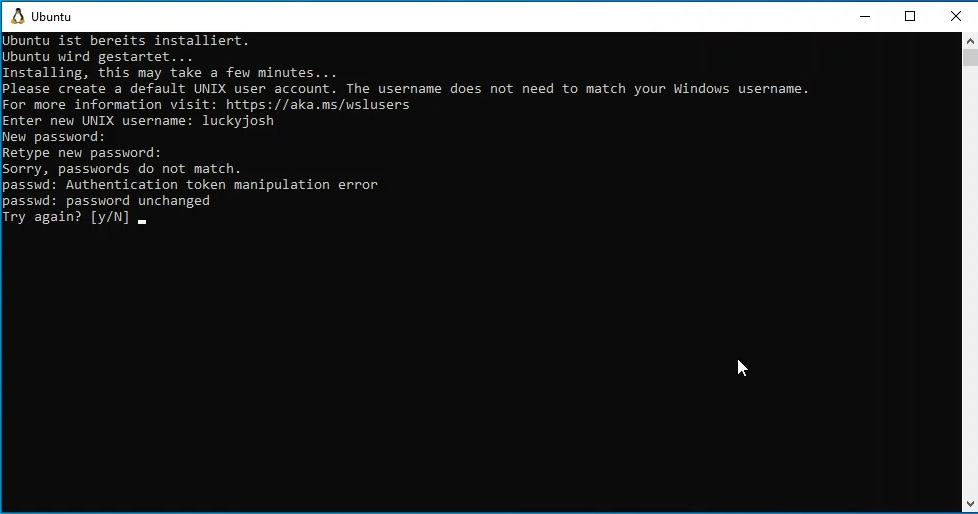
If the second password entry does not match the first, you must first confirm your attempt to try again by typing y (short for yes).
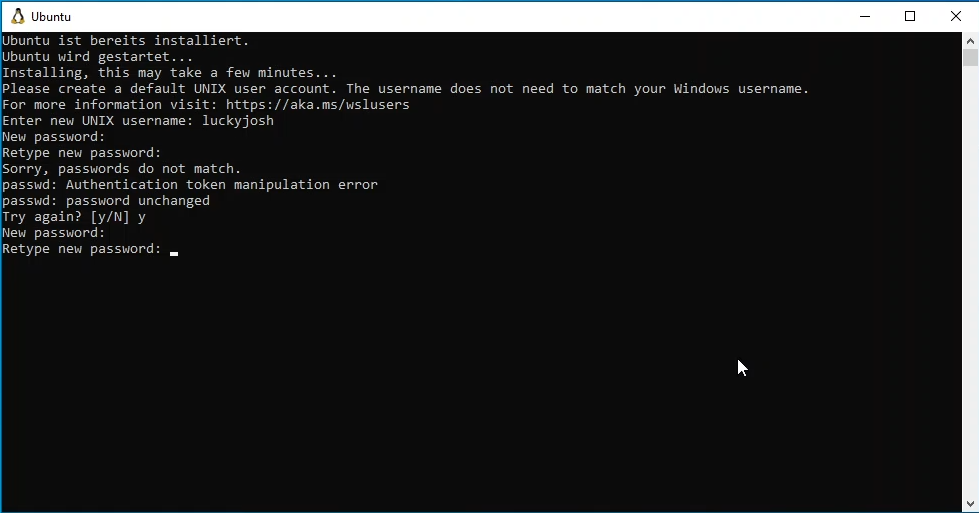
Then, repeat the password entry; just as before, you must enter it twice.
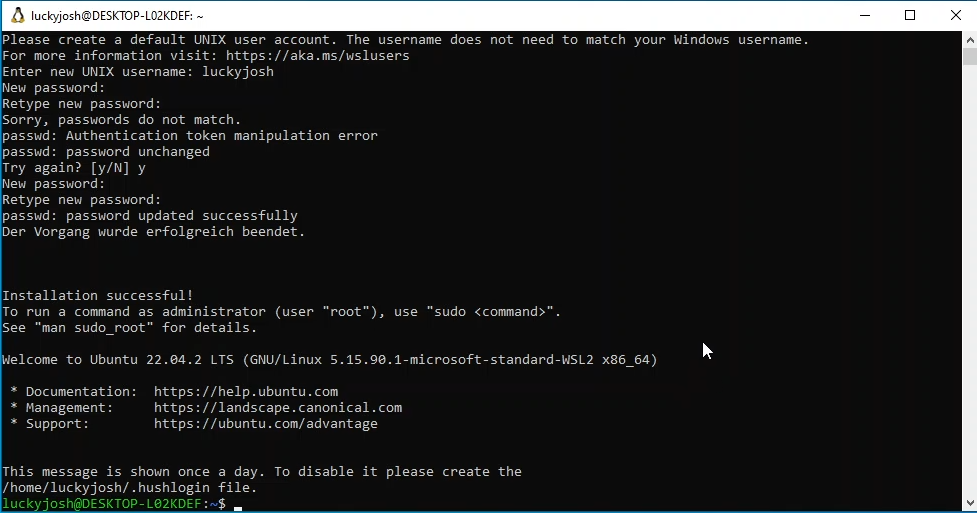
Once the installation has been successfully completed,
you will see output similar to the following screenshot.
The last line (in the screenshot: luckyjosh@DESKTOP-L02KDEF:~$)
will be referred to hereafter as the prompt.
This line consists of two parts.
The information preceding the colon is composed of the username
(in the screenshot: luckyjosh) and the computer name
(in the screenshot: DESKTOP-L02KDEF).
You will see different names listed here on your system.
The part following the colon consists of a tilde ~ and a dollar sign $.
This is the typical structure of the Linux command line interface, bash,
which is primarily used to interact with the Linux operating system.
A more detailed introduction to using it will be provided during the workshop;
however, we will be using it below to install the necessary software.
Before proceeding to the next section, you can close the terminal window by entering
exitor by clicking the X in the top right corner.
Windows Terminal
Windows Terminal serves as a replacement for the standard WSL command line. You can install Windows Terminal from the Microsoft Store.
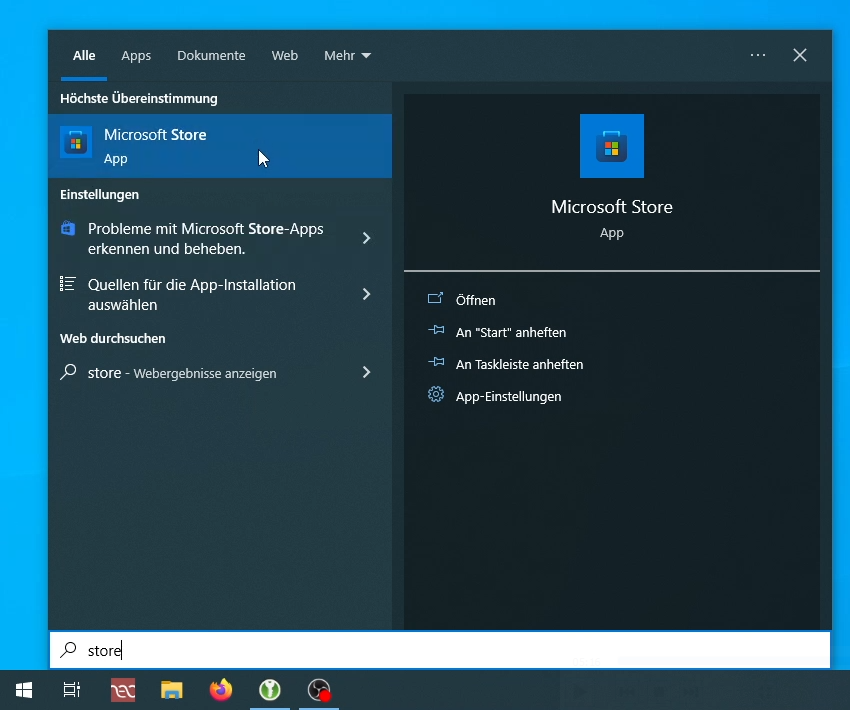
You can find the Microsoft Store again by using the search bar in the Start menu:
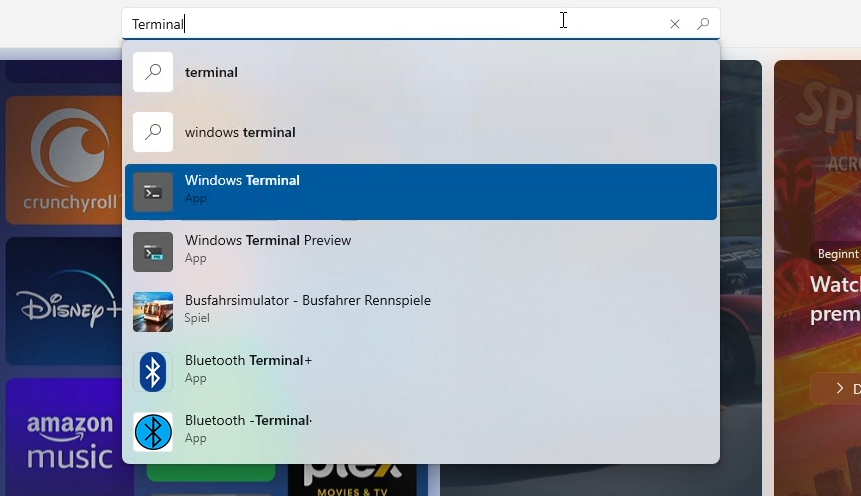
Search for Terminal in the Microsoft Store and select Windows Terminal:
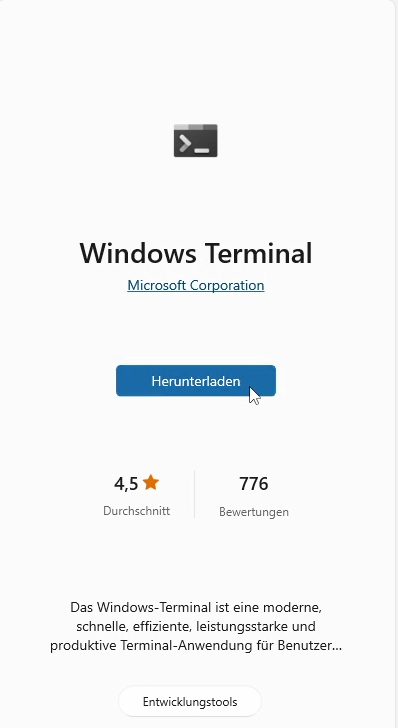
And in the following window, click Download:
Once the installation is complete, you can close the Microsoft Store.
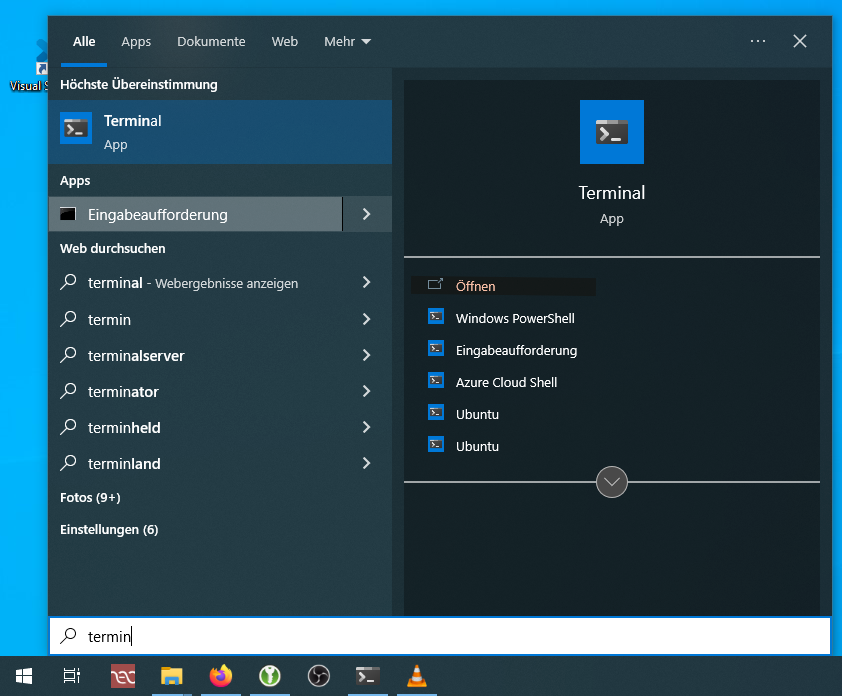
Windows Terminal can be opened via the Start menu. Immediately after installation, the Terminal is usually located at the very top of the list; otherwise, you can type Terminal. The Terminal is opened by clicking Open in the right-hand column.
When you open Windows Terminal for the first time, an information banner appears at the top of the window, which you can close by clicking the X on the right edge.
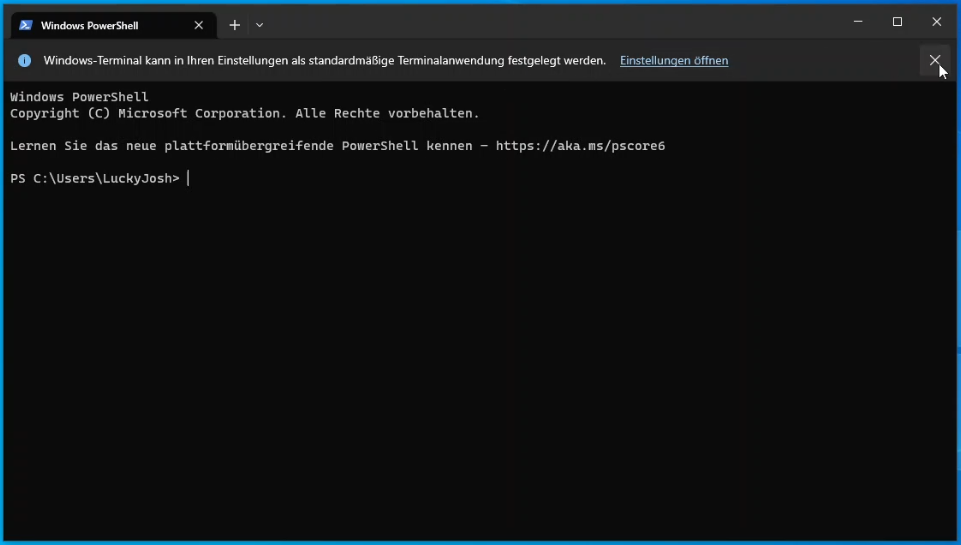
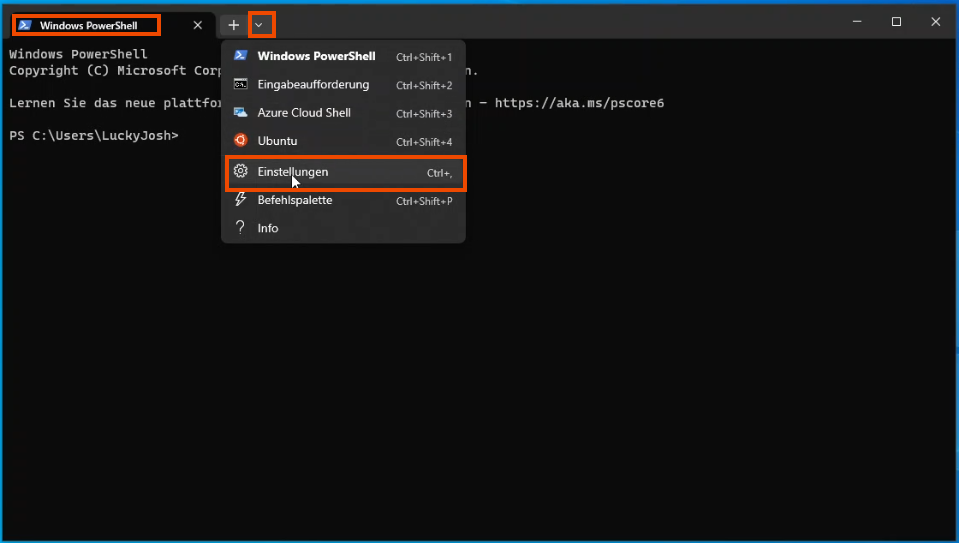
By default, Windows Terminal opens Windows PowerShell (identifiable by the text displayed in the tab). To open an Ubuntu command line, first click the downward-pointing arrow at the top of the window; this opens a drop-down menu from which you must select Settings:
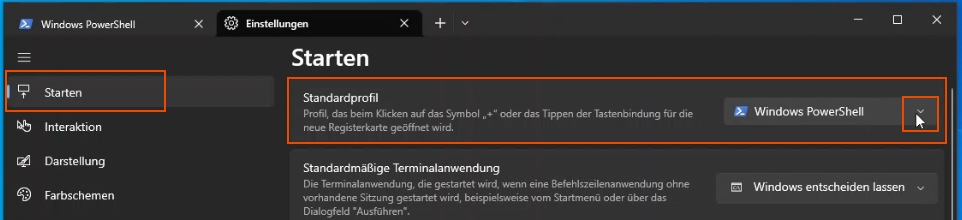
Here, you can configure Windows Terminal to open Ubuntu by default upon startup. Under the Startup section in the left-hand column, you will find the setting option Default profile; clicking the down arrow will open a selection menu.
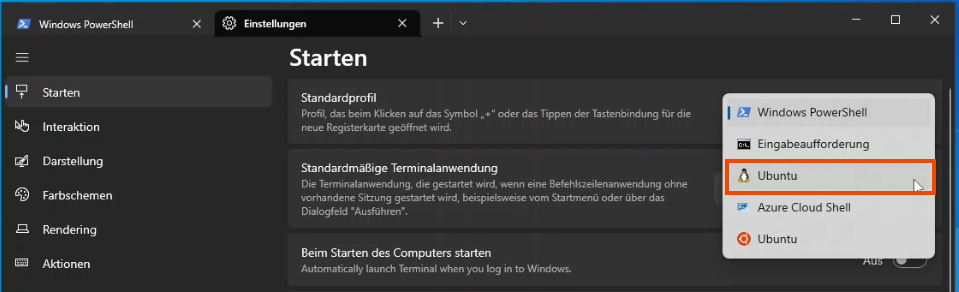
From the selection menu, choose Ubuntu (if Ubuntu appears multiple times, select the entry with the penguin icon  ):
):
Next, you can close the terminal again using
exitor by clicking the X in the top-right corner.
Git, Make and more
To install the programs Git and Make, first open a Windows Terminal (as described in the Windows Terminal section, via the Start menu). Thus, you can immediately verify whether setting the default profile worked correctly.
Next, perform an update using the following command:
sudo apt updateExecuting this command may take some time and requires an active internet connection.
Commands that begin with sudo require special access privileges. Therefore, you will always need to
enter your Linux user password (not necessarily your Windows user password) first.
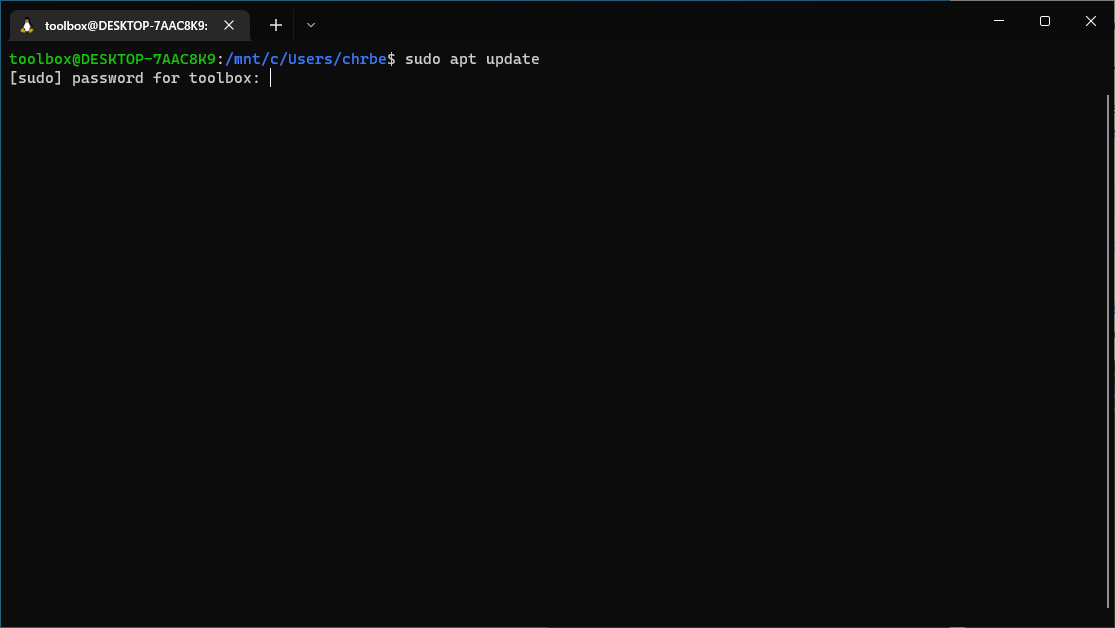
A successful update looks roughly like this; however, the list of programs displayed (those available for updating on your system) may be significantly longer the first time you run this command.
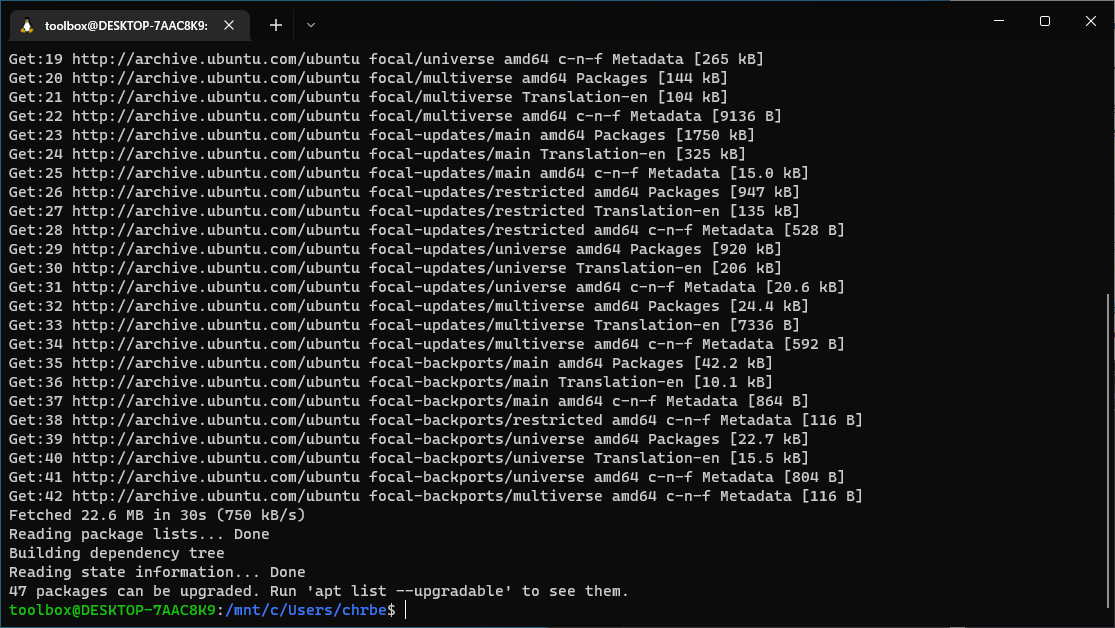
The updates must now be installed, as you have only downloaded the metadata thus far. This is done by entering the command:
sudo apt upgradeSubsequently, you may be prompted to confirm a second time by typing the letter y and pressing the Enter key. (Here, too, the displayed list will likely be significantly longer.)
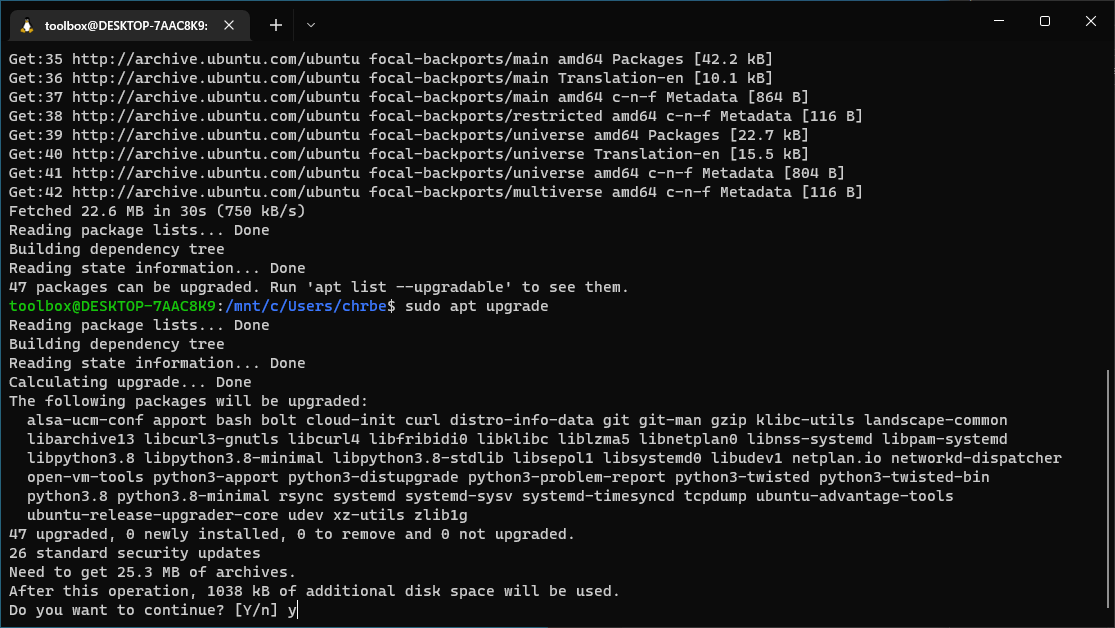
You can now install the three programs git, make and curl.
This is done by entering the command:
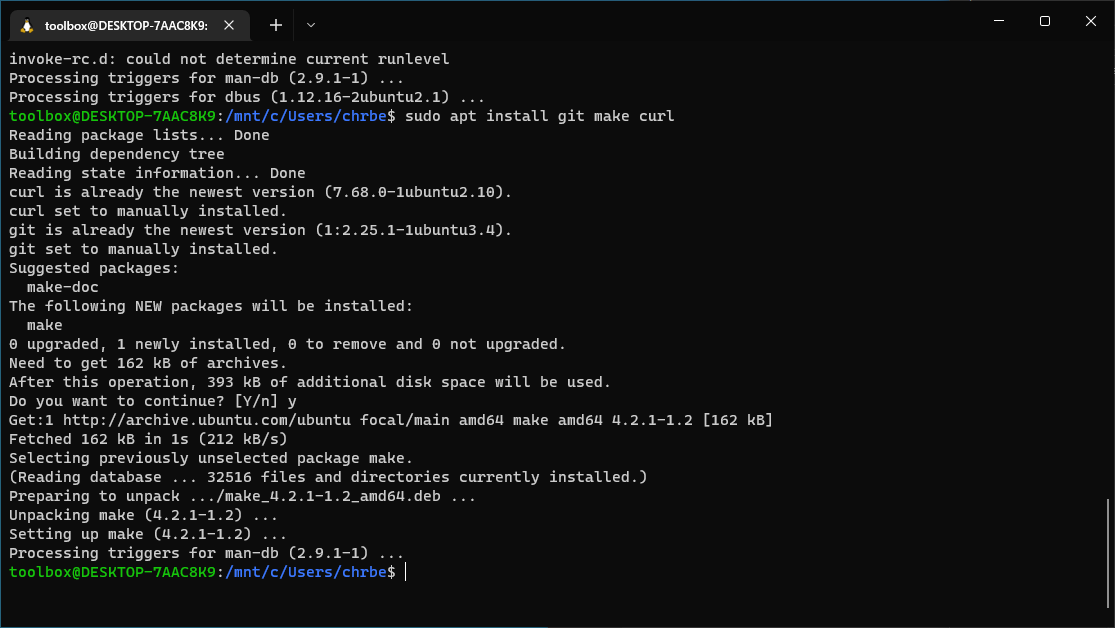
sudo apt install git make curland then confirming by pressing the Enter key. This installation process may also take some time to complete.
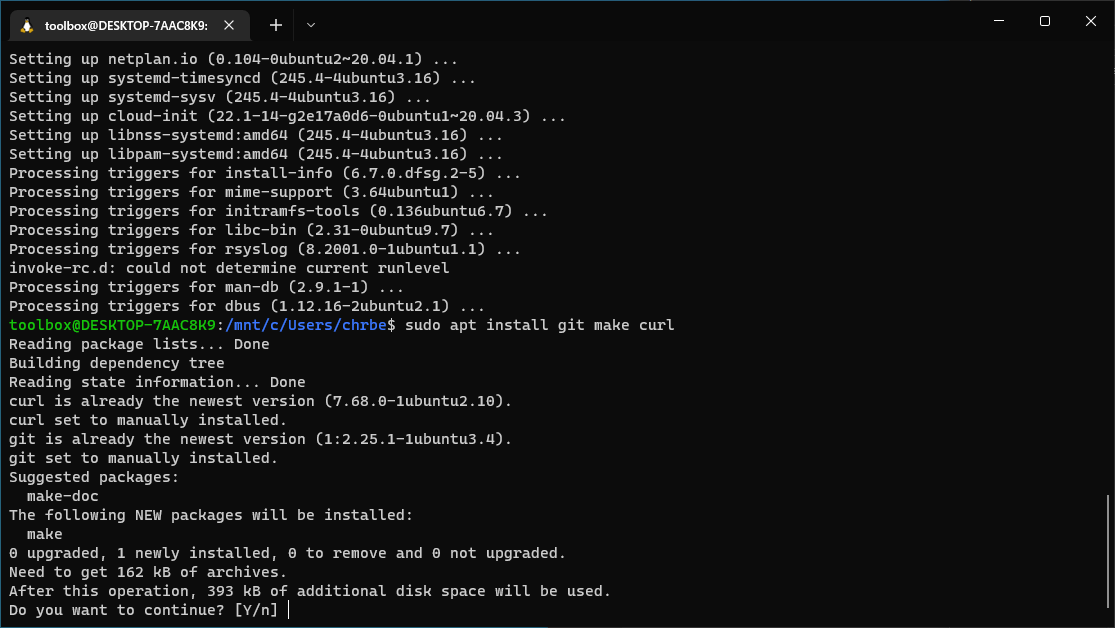
The installation is successful (as shown below) if there are no error messages.
Git Settings
A few additional settings still need to be configured for Git. To do this, enter the following commands into a Windows Terminal (as before) and confirm each one by pressing Enter.
git config --global user.name "John Smith"git config --global user.email "john.smith@example.com"git config --global rebase.stat truegit config --global merge.conflictstyle diff3No screenshots have been included here intentionally. This is so that you can practice using the Windows Terminal yourself. If you are still unsure about what to do with the commands above, you can proceed with the rest of the guide (which includes images) for now. You can then return to configure these settings later once you feel more confident.
Installation Folder ~/.local
A specific folder is required for the Python Installation: Miniforge3 and TeXLive. You can create this folder using the following command:
mkdir -p ~/.localThis command creates a folder named .local if it does not already exist;
if the folder already exists, the command does nothing.
Python Installation: Miniforge3
To install the programs necessary for convenient use of the Python programming language, we will use the tool mamba.
You can download the installation file Miniforge3-Linux-x86-64.sh by entering the following commands into the Windows Terminal:
cd ~/.localThis command changes the current directory to the folder where the installation file is to be downloaded.
The current path is displayed between the : and $; it should now be ~/.local.
This is the folder you created in the previous command.
Use this command to download the installation file. The download may take some time.
curl -LO https://github.com/conda-forge/miniforge/releases/latest/download/Miniforge3-Linux-x86_64.shBy running
lsyou can list all the files located in the current path. The file Miniforge3-Linux-x86-64.sh should be listed there.

To install, type or copy the following command into a terminal.
bash Miniforge3-Linux-x86_64.sh -p ~/.local/condaAs before, this command is executed by pressing the Enter key.
Next, you will need to accept the terms of use. These are fully displayed by pressing the Enter key.

Depending on the size of your terminal window, the text may be displayed one line at a time.
This is true if you see --More-- on the last line.
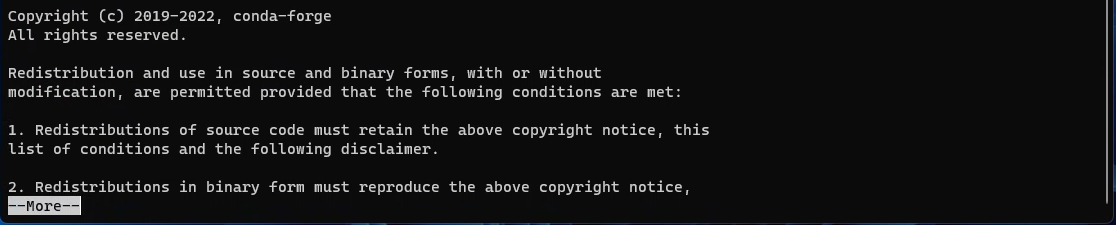
Press the Enter key repeatedly to scroll to the end (see the next screenshot) of the terms of use. At the end of the terms of use, you must accept them by typing yes and then pressing Enter.
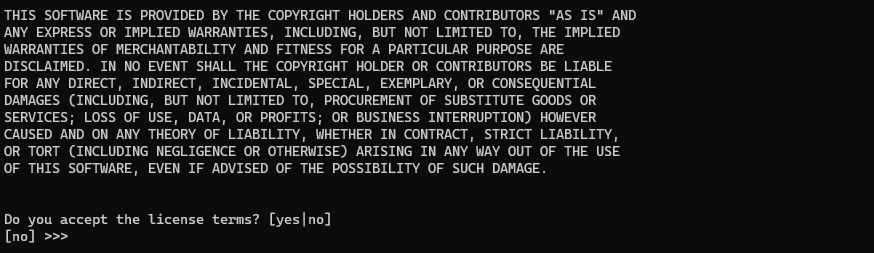
You then start the installation by pressing Enter again. This step may also take a few minutes.
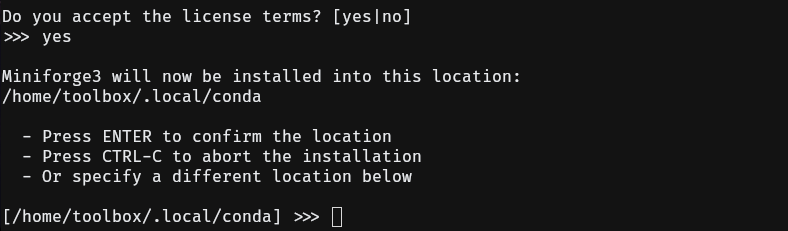
The installation concludes with the following lines: Here, you must once again enter yes and confirm by pressing Enter.
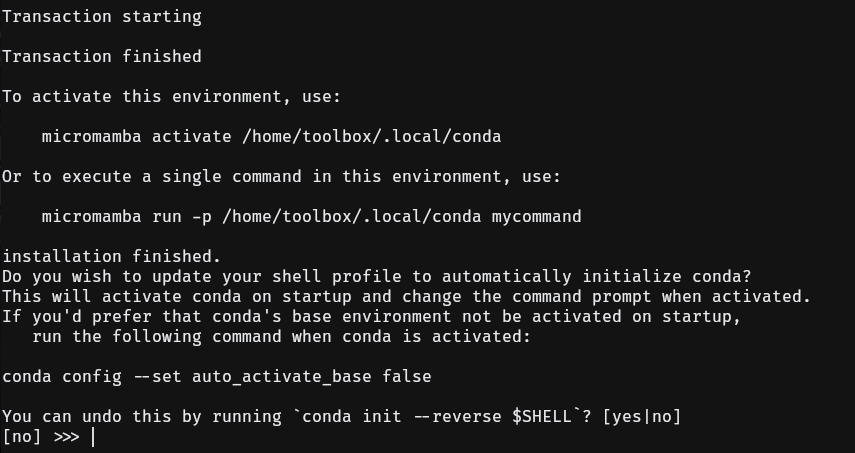
When the last line displayed is the command prompt again, the installation is complete.
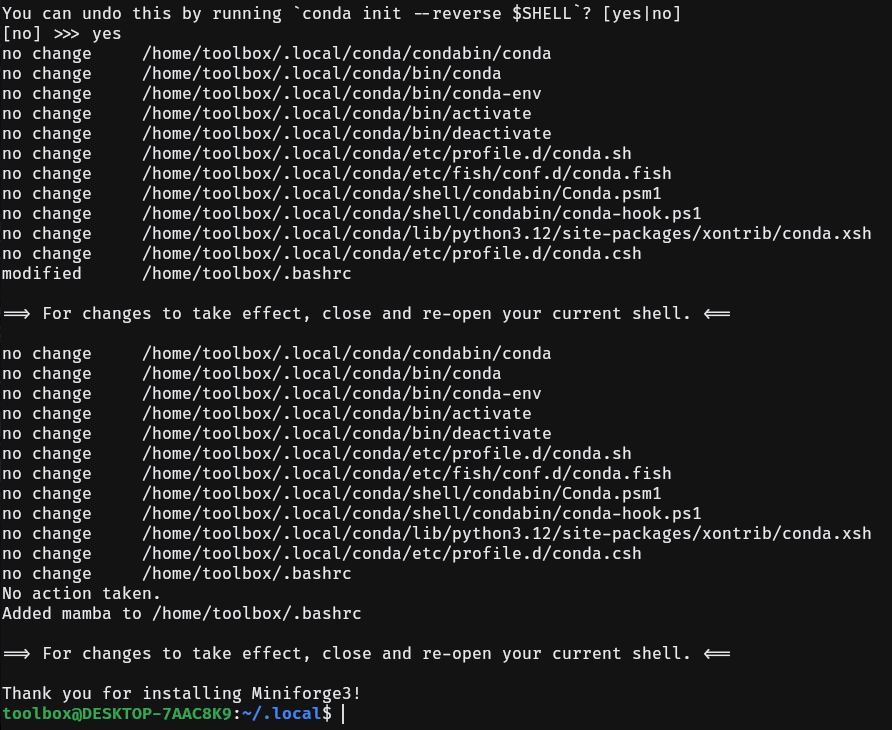
In the new terminal window, (base) should now appear at the beginning of the command prompt.

Now, you still need to install the Python packages introduced in the workshop. To do this, we will use a virtual environment. We will explain what an environment is and what it is used for later in the workshop. In short, we are creating a separate Python installation containing only the packages you will need for both the workshop and the practical course.
To do this, use the following command:
$ mamba create -y -n toolbox python=3.14 numpy matplotlib scipy uncertainties sympyThe installation begins with the following output:

and will once again take some time. The installation is complete when the command prompt is displayed again.
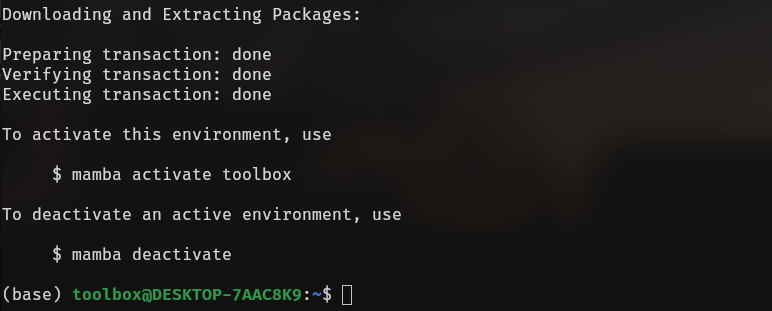
After a successful installation, you can delete the installation file Miniforge3-Linux-x86-64.sh using the command:
rm ~/.local/Miniforge3-Linux-x86_64.shTeXLive
With the following three commands, you download and execute the installation script.
The first command navigates to the .local folder you created above.
The second command downloads and extracts the installation script,
and with the third command, it is launched
cd ~/.localcurl -L http://mirror.ctan.org/systems/texlive/tlnet/install-tl-unx.tar.gz | tar xzTEXLIVE_INSTALL_PREFIX=~/.local/texlive ./install-tl-*/install-tlStart the installation by typing I followed by Enter.
After the installation, you must inform the system where LaTeX has been installed.
This can be done in the file ~/.bashrc.
To do this, execute the following command in the terminal:
$ echo 'export PATH="$HOME/.local/texlive/2026/bin/x86_64-linux:$PATH"' >> ~/.bashrcThis writes the information in ~/.bashrc.
Close the terminal and open a new one. Then, enter the following commands in the new terminal to configure LaTeX settings:
tlmgr option autobackup -- -1tlmgr option repository https://mirror.ctan.org/systems/texlive/tlnetluaotfload-tool --update --forceIf this installation fails due to insufficient disk space, there is this option to install a minimal version of TeXLive instead.
Visual Studio Code (VSCode)
Installation
Visual Studio Code (VSCode) is a text editor suitable for writing both program code in Python and documents in LaTeX. Furthermore, it offers a wide range of additional features.
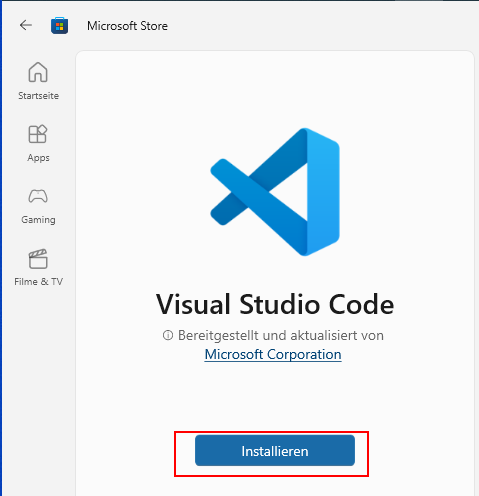
VSCode, like Windows Terminal, can be installed via the Microsoft Store. Open Microsoft Store, as in the step for Windows Terminal. Search for Visual Studio Code and select the corresponding entry from the list:
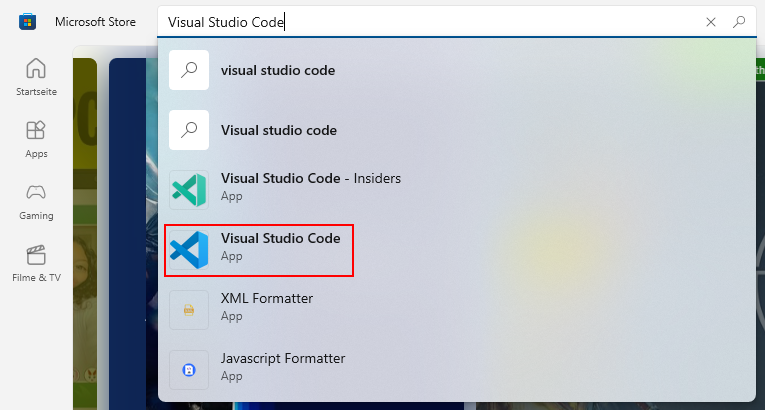
On the following page, you can install VSCode by clicking the Install button.
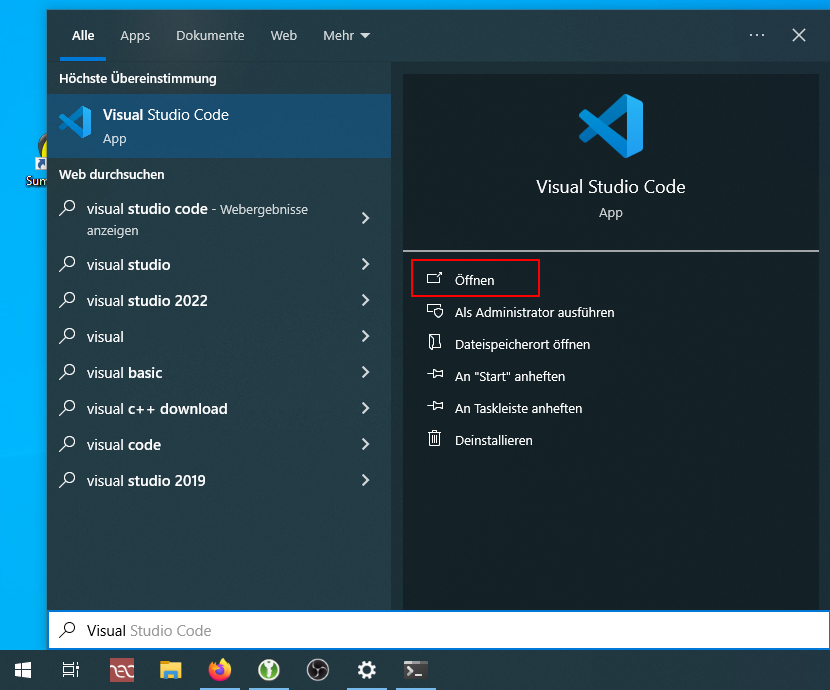
From the Start menu (which, as before, can be found by searching Visual), you can launch VSCode by clicking on Open.
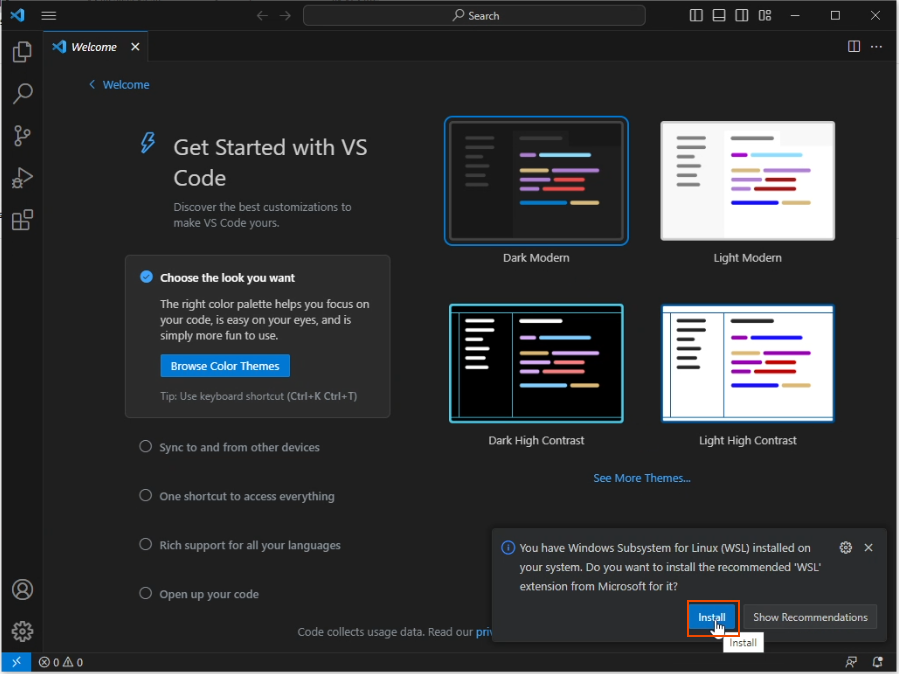
Upon launching VS Code for the first time after installation, an information box should appear in the bottom-right corner. We recommend clicking the Install button in this box when prompted to install the WSL extension.
VSCode: Language
To change VSCode’s language settings, you can follow the steps below. This is not necessary if the language is already set to English or if you do not wish to change the language.
To open the language settings, first press the F1 key. This opens an input window where you can search for settings.
Here, search for Configure Display Language. You can select this setting by pressing the Enter key.
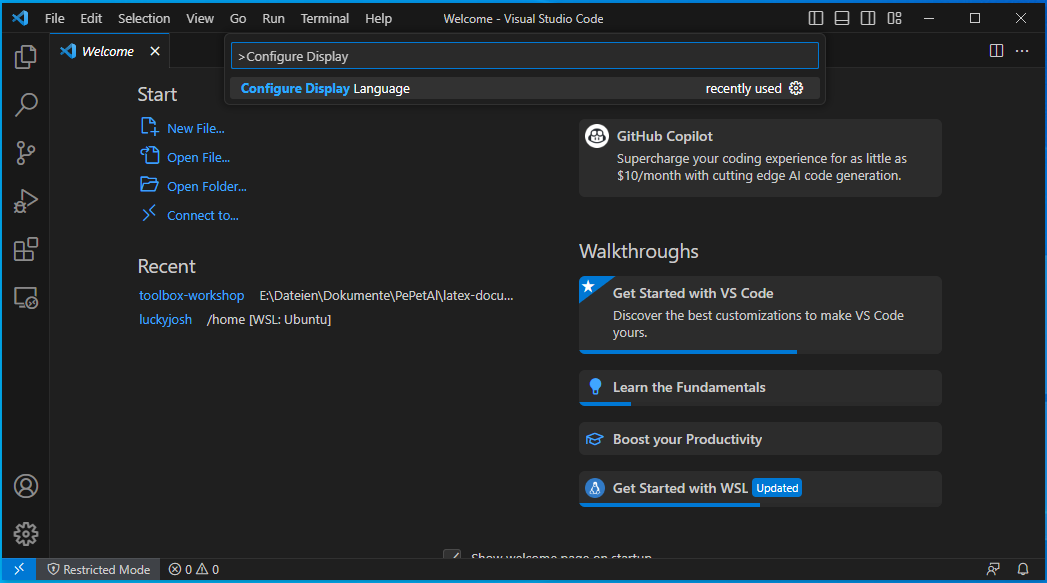
In the subsequent selection menu, you can choose your desired language with a left-click.
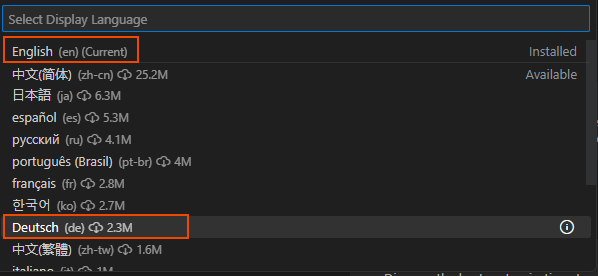
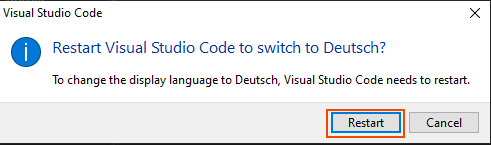
The selected language will be downloaded (if necessary) and will become available after restarting VSCode. This can be performed in the window that appears next.
VSCode: Setting Up the Terminal
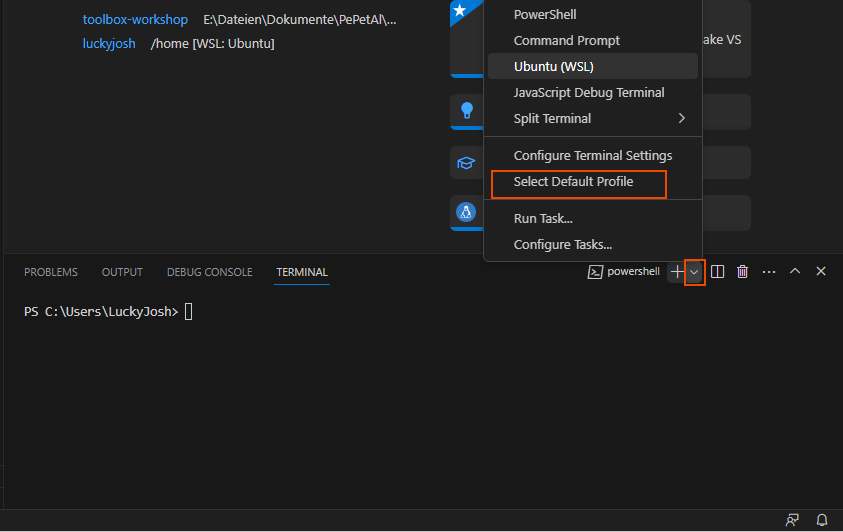
You can open a terminal in VSCode using the keyboard shortcut Ctrl + Shift + ` or via the menu bar: Terminal › New Terminal. However, immediately after the initial installation, this terminal defaults to the Windows PowerShell. Just like with the Windows Terminal, this terminal also needs to be reconfigured. Click the downward-pointing arrow to the right of the + sign, and select the option Select Default Profile.
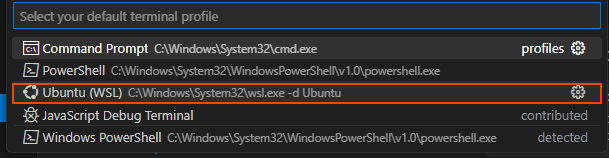
In the following selection, click on Ubuntu (WSL) once again.
Next, you can close the currently open terminal by clicking the trash can icon.
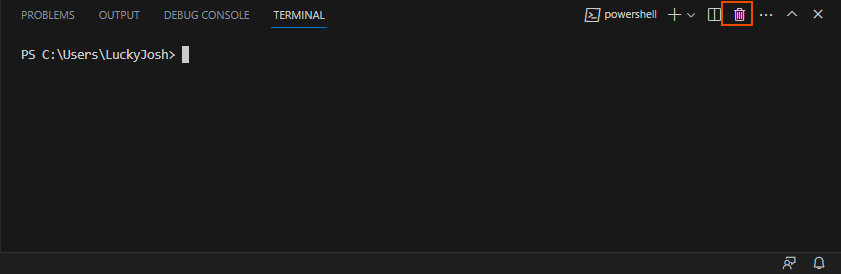
Now, when a terminal is opened again, e.g., with Ctrl + Shift + ` , it should now look like the terminal you have (by now) become accustomed to:
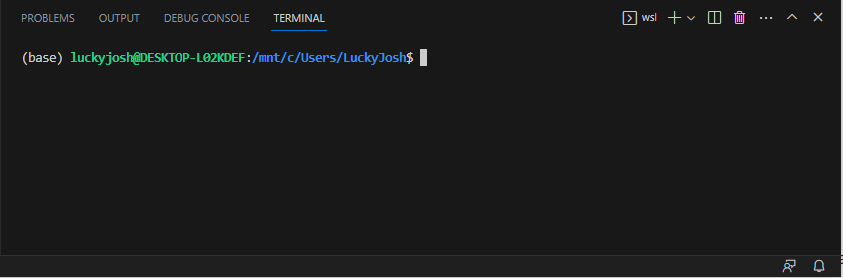
You can redirect git to use VSCodium as an editor. For this, execute the following command in the newly set up terminal
git config --global core.editor "codium --wait"PDF Viewer
Sumatra PDF
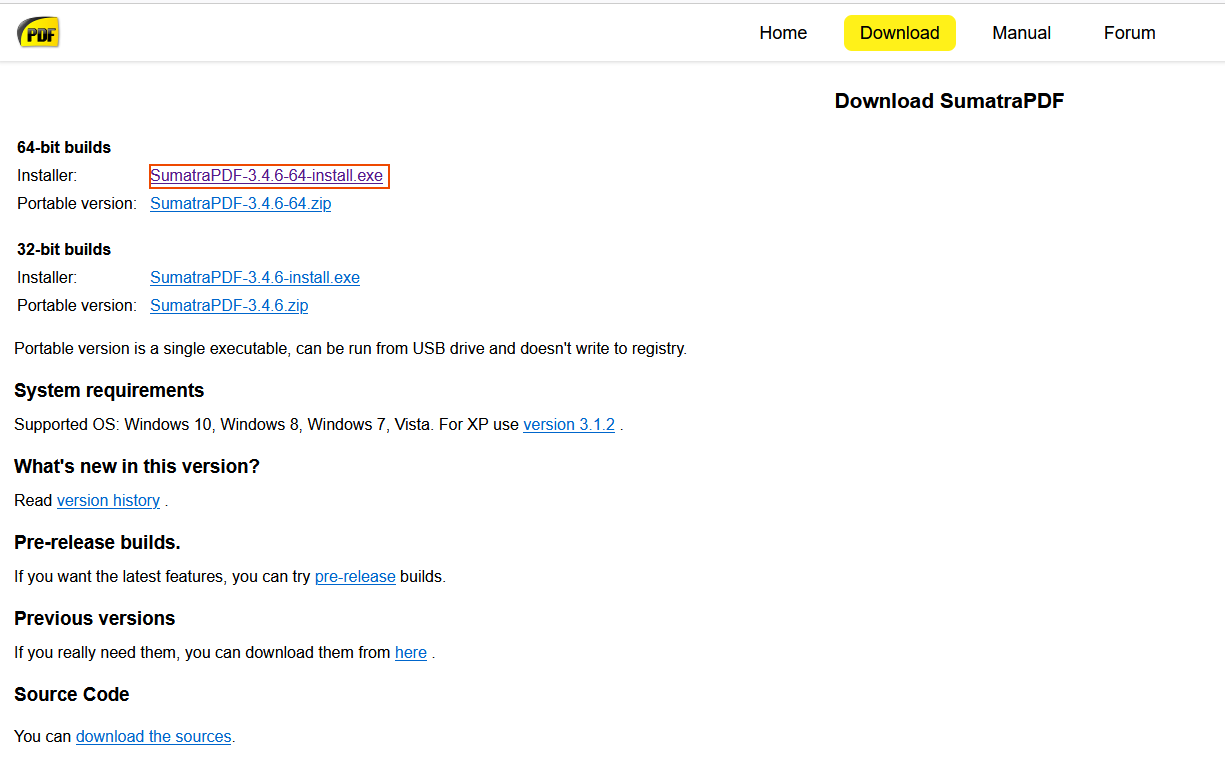
For Windows, you should use Sumatra PDF as your PDF viewer. We do not recommend using Acrobat Reader, as it locks the PDF file, preventing TeX from overwriting it (you will learn why this is important during the workshop). You can find the download at the following link:
Sumatra Download{:target=“_blank”}
On the download page, you can then download the x64 version of Sumatra PDF by left-clicking on the highlighted link.
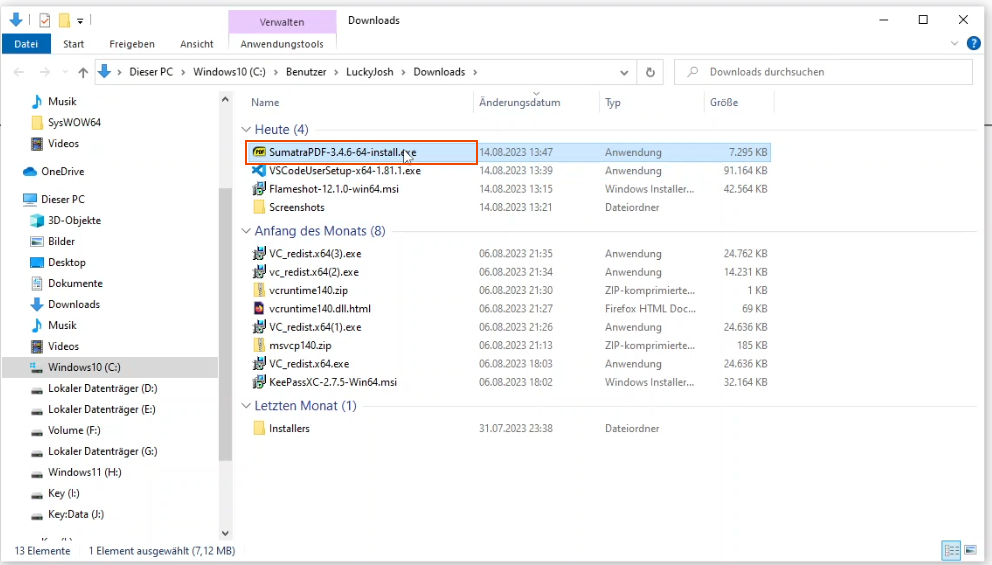
The downloaded file will be located in your Downloads folder. You can run it by double-clicking on it.
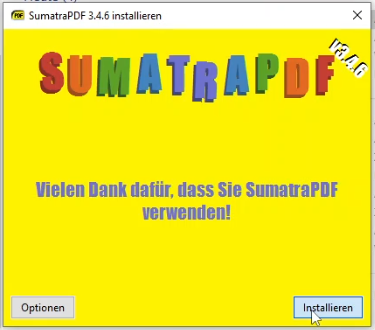
Consequently, the following window will open, allowing you to start the installation by left-clicking on Install.
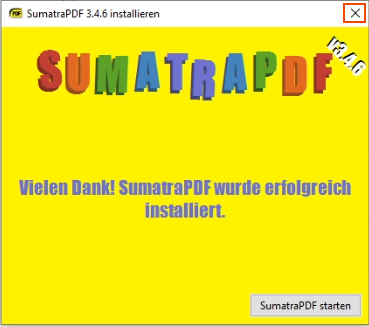
Close the window after installation by clicking the X.
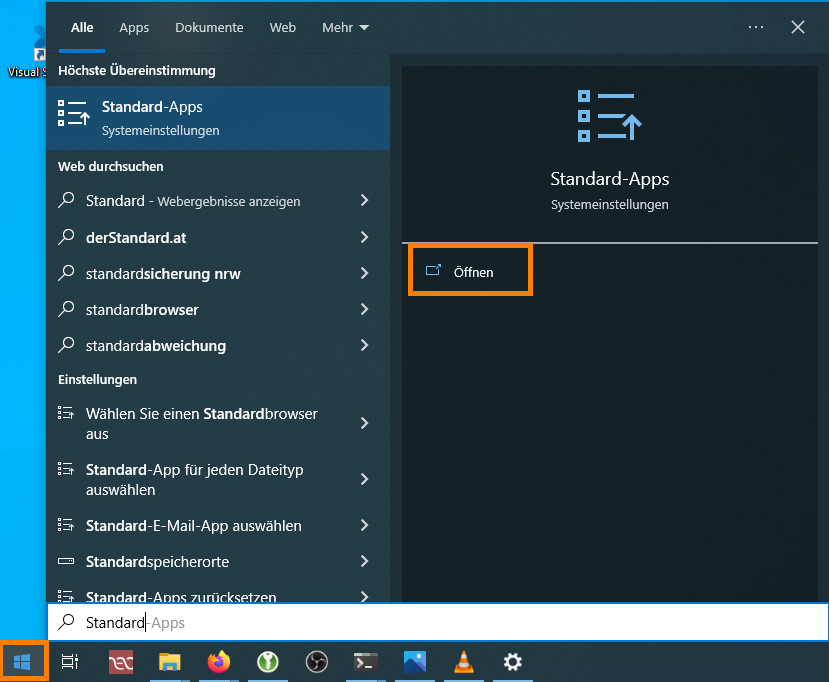
Finally, you should set Sumatra PDF as your default PDF viewer. To do this, search for Default apps in the Start menu. Then, open Default apps.
In the window that opens, search for .pdf in the search box, and then click on the icon at the right end of the search result.
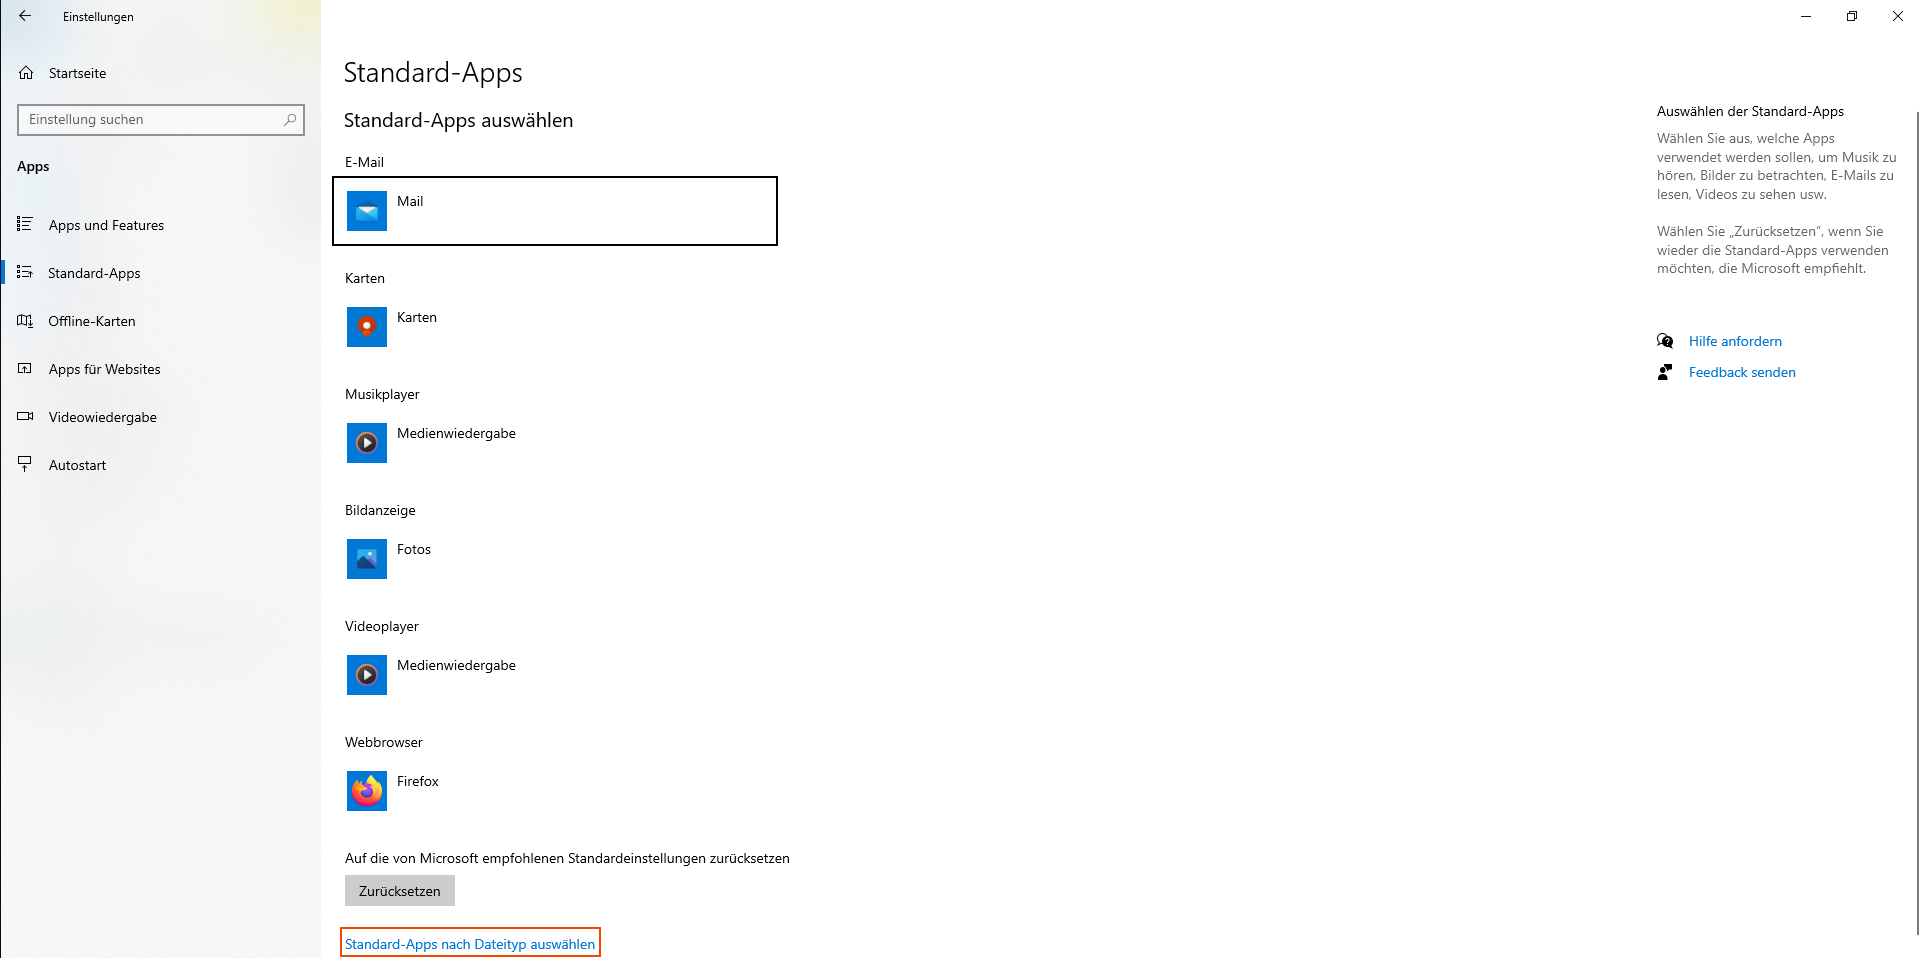
In the window that opens, search for .pdf in the search box, and then click on the icon at the right end of the search result.
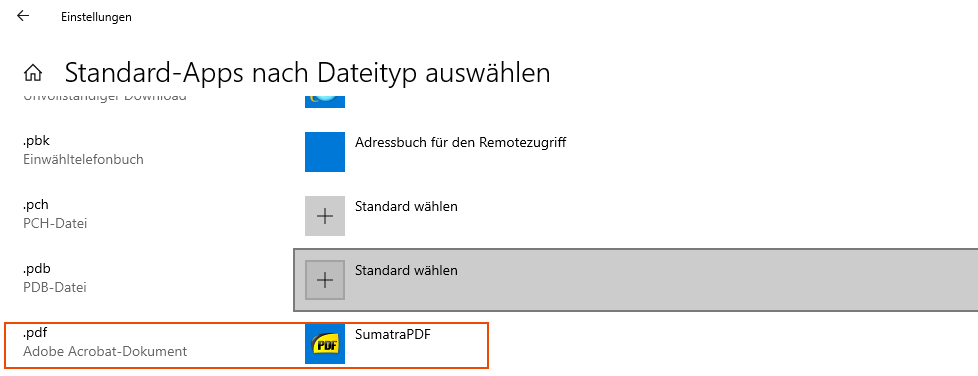
If SumatraPDF is already listed in the second column, you do not need to take any further action and can close the window as usual by clicking the X.
If a program other than SumatraPDF is listed instead (e.g., Acrobat Reader or Microsoft Edge), open a selection menu by clicking on the program name. From this menu, select SumatraPDF.
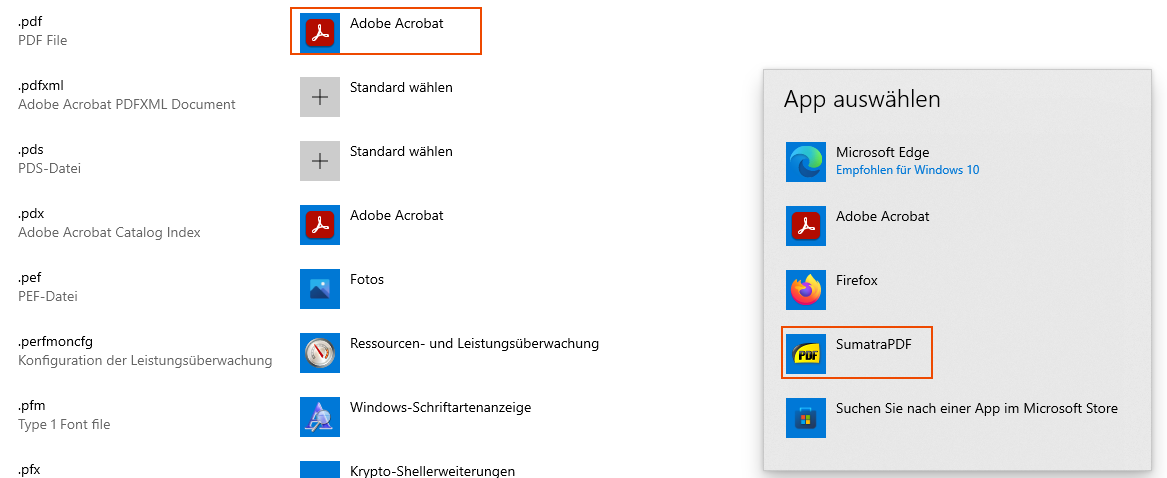
Evince
To open PDF files directly from Windows Terminal easily, it is also recommended to install a PDF viewer for WSL. To do this, enter the following command into Windows Terminal:
sudo apt install -y evinceTesting
In the following section, we will verify that the installations were successful, so that you can start the workshop with ease.
Mamba: Python
To test the Python installation (via Mamba), you should close all open Windows Terminal windows and open a new one.
To use the installed packages, activate the virtual environment using this command:
mamba activate toolboxExecuting this command changes the prompt from (base) to (toolbox).
Now, enter the following commands into Windows Terminal, one by one:
After entering the first command, the appearance of the command line will change slightly.
At the beginning of the line should be >>>.
pythonimport numpyimport matplotlib.pyplot as pltimport scipyimport sympyimport uncertaintiesplt.plot([1, 2, 4])plt.show()A window containing a coordinate system and a plotted line should appear.
Enter the command
exit()to exit the python interpreter.
Make
You can test Make by opening a Windows Terminal and entering the following command. You can also continue using the terminal from the Python test. The test consists of just a single command:
makeYou should see the following output (or its German equivalent):
make: *** No targets specified and no makefile found. Stop.TeXLive
The TeXLive installation is also tested using Windows Terminal. Enter the following command:
luatexThe following (or similar) output should appear:
This is LuaTeX, Version 1.24.0 (TeX Live 2026)
 restricted system commands enabled.
**
The program luatex is now running.
You can exit this by pressing the key combination Ctrl + c.
Now you can test another program used by LaTeX for bibliographies.
Test this by entering the command:
biberThe Biber help text should appear:
Usage:
      biber [options] file[.bcf]
      biber [options] --tool <datasource>

      Creates "file.bbl" using control file "file.bcf" (".bcf" extension is
      optional). Normally use with biblatex requires no options as they are
      all set in biblatex and passed via the ".bcf" file

      In "tool" mode (see B<--tool> option), takes a datasource (defaults to
      "bibtex" datasource) and outputs a copy of the datasource with any command-line
      or config file options applied.

      Please run "biber --help" for option details
Finally, we will test the program used for viewing package documentation. The test command is:
texdoc texliveClose the window that opens and exit Windows Terminal with:
exitUpdating
Mamba
To install updates for Mamba, enter the following command into a Windows Terminal:
mamba update -n toolbox --all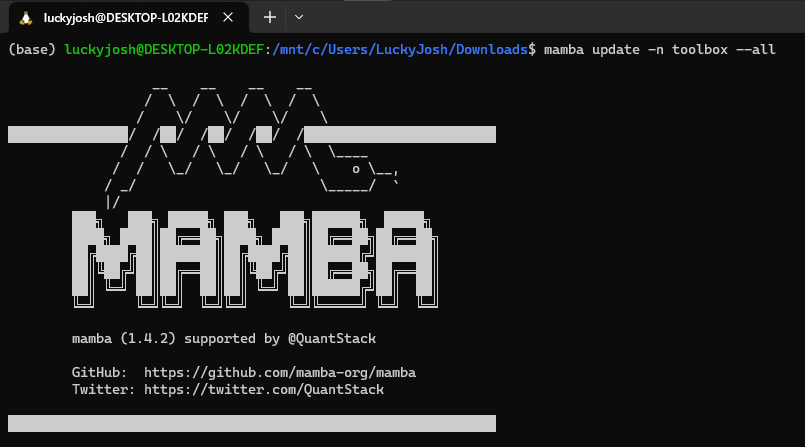
Confirm the installation by typing Y followed by Enter.
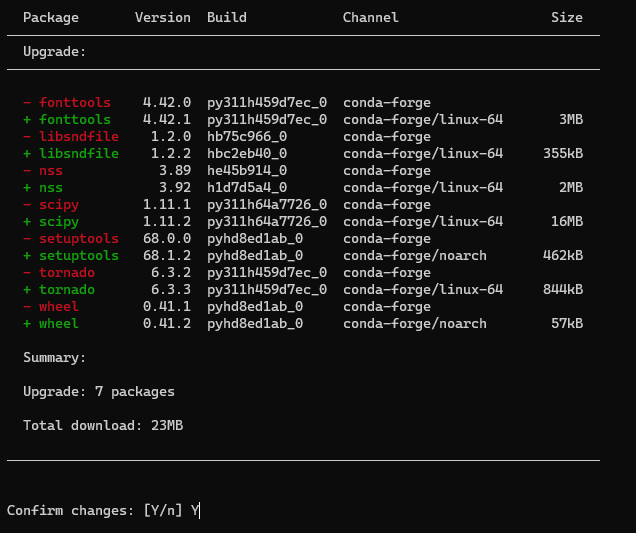
As you have (by now) come to expect, the installation is complete once the command prompt reappears in the terminal.
Git, Make und Other Unix Tools
To receive updates for Unix tools, (as with the initial installation) enter the following two commands into Windows Terminal, one by one:
sudo apt updatesudo apt upgradeTeXLive
Updates for TeXLive are installed by entering the following command into Windows Terminal:
tlmgr update --self --all --reinstall-forcibly-removed