
What should you keep in mind while learning a (new) programming language?
Programming languages have a syntax that dictates which keywords exist and what they do. It also suggests how code should be written; much like the grammar in a spoken language, it dictates the sequence of words or commands that the reader (whether human or computer) can understand. In addition, it involves the characters used to structure sentences or code.
Compared with C++ or Java, two widely used languages,
python uses fewer characters to structure code.
There are still a few, however, so get your
:, {, (, [, ], ) and } keys ready.
The first program typically written in a new programming language is Hello World!
We will do the same here and teach python to output something for us.
VSCode/VSCodium
To start, open VSCode or VSCodium (from here referred to as VSC). Do you have a Mac? Then, open Finder, type VSCodium, and open the application.
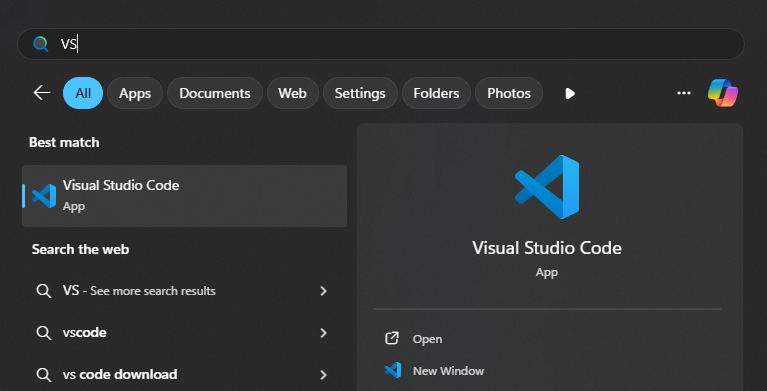
If you’re using Windows, click on the Windows logo  at the bottom of the screen,
type VSCode, and click on the VSCode app.
at the bottom of the screen,
type VSCode, and click on the VSCode app.
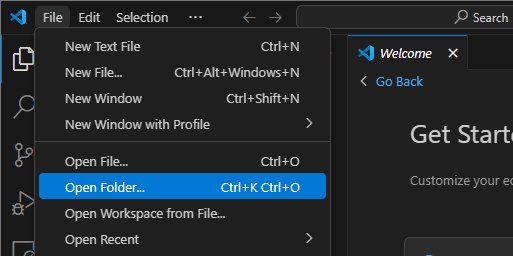
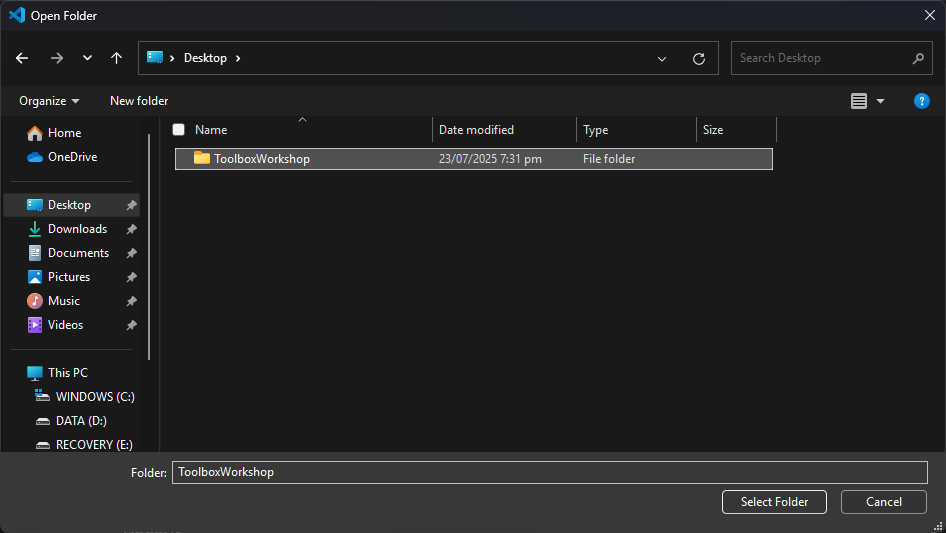
Now, create a folder called ToolboxWorkshop on the Desktop and create a file named introduction.py inside it. In VSC, there’s a File menu in the top bar; click on it, and then select Open Folder.
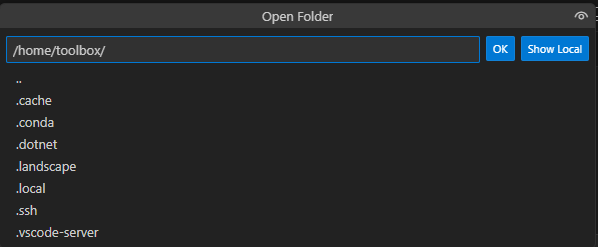
The following dialog might open in the middle of VSC. If it does, click Show local.
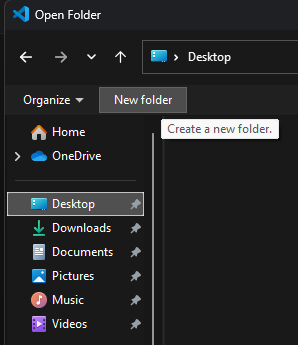
Navigate to the Desktop in the window that appears and create a new folder called ToolboxWorkshop. In Windows, you can use the New folder button for this.
Open this folder with the Select Folder button on the lower right.
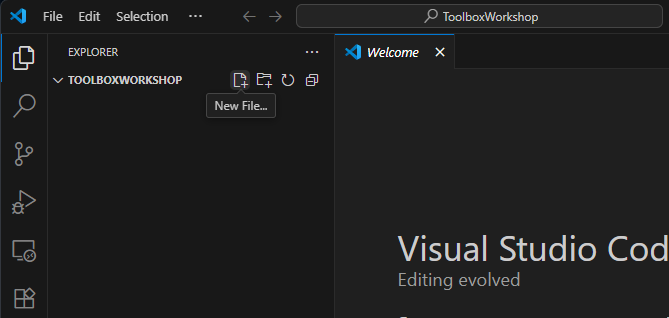
In VSC, create a file in the left sidebar; to do so,
click on the first icon  to the right of TOOLBOXWORKSHOP.
Rename the file to introduction.py.
When you’ve entered the name, confirm it by pressing Enter.
to the right of TOOLBOXWORKSHOP.
Rename the file to introduction.py.
When you’ve entered the name, confirm it by pressing Enter.
Hello World!
For our first python program, we will write code to output Hello World!
To do this, write the following line in introduction.py:
print("Hello World!")You might notice that the colors in VSC
differ from those in the code block. This is not an error.
This color scheme is known as highlighting, and it varies
by program. Therefore, it’s no issue at all
if the colors differ between the code blocks here and
in VSC.
Once you get used to the colors in VSC, you’ll find them quite handy,
as they make it easier to recognize structures within the code.
They also help spot typos, for example, if print is no longer
highlighted, because prnit was typed instead.
print is a python function used to output various things.
We will use it frequently in these lessons to display all sorts of output.
Anything placed within () is called an argument;
in this case, it is the text/string “Hello World!”
Additional arguments can be output by separating them with a comma (,);
for example, print("Hello World!", "Hello World!").
You can think of a python function as behaving like a mathematical function,
such as
The difference is that python allows more than just numbers to be used as arguments.
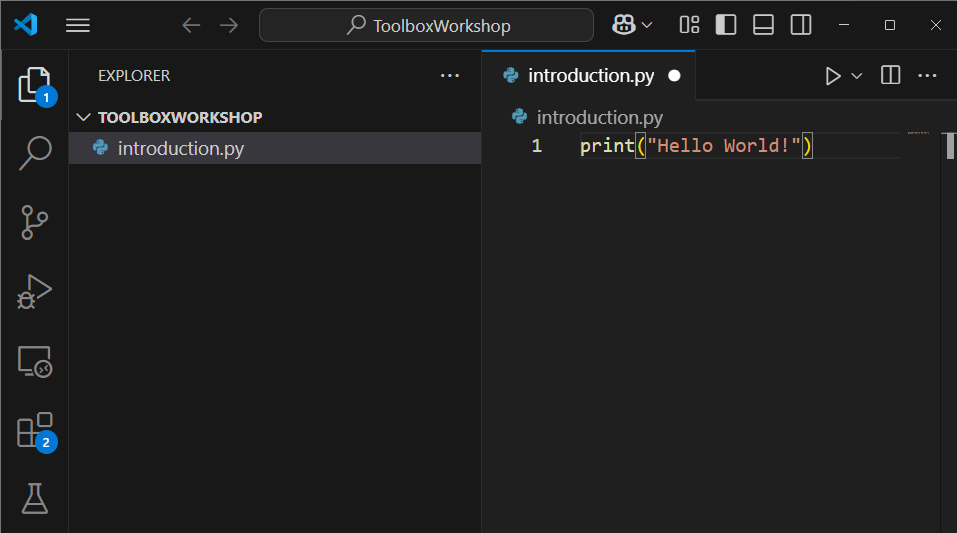
Your VSC should now look similar to the screenshot below. The white circle next to the filename is important. It indicates that the changes in the file have not yet been saved. You can save using Ctrl + s, or via File and then Save File. The keyboard shortcut for saving on your operating system is also displayed there.
Open the terminal and run python
This section is more detailed in certain parts for Windows; if you are using a different operating system, these steps are not necessary for you.
Now, we open the terminal integrated into VSC to run our python file.
To do this, right-click the file name in the list on the left
and then click Open in Integrated Terminal.
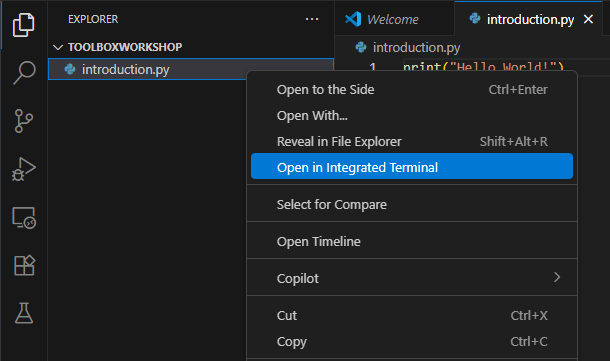
The terminal is now open at the bottom of the window.
Type ls into your terminal and run the command
by pressing Enter.
ls stands for list and displays the files contained in a folder.
You will see a list of names;
there should be introduction.py among them.
Now type python introduction.py into your terminal and run it by pressing Enter.
The output will be Hello World!, exactly
what we passed as an argument to print.

Your terminal should now look similar to the one in the screenshot.
The green text will differ.
Your username appears before the @ (not toolbox),
followed by the name of your laptop or computer.
The path appears in blue after the :, with folders separated by /.
This is the prompt, and it can be customized.
Comments
In programming languages, comments are used to explain the code.
This is useful for you and for others working with your code,
such as your lab partner.
Comments can also be used to provide headings for sections of code.
For lab reports, these might include reading in data,
least-squares fitting, and graphical representation.
In-line comments (or comments placed on the same line as the code)
begin with #.
Longer comments begin with """ and end the same way.
We can therefore add comments to our current code in introduction.py as follows:
"""
This file contains the code for the python introduction of the Toolbox Workshop.
site: https://toolbox.pep-dortmund.org/introduction/python_en/

The last included section is: Comments
"""

# Lesson: The first steps

# Subsection: Hello World!
print("Hello World!")  # prints the words Hello World! as an output
# print("Hello World!") <-- this line will be ignored
What do you notice about the output when you run this code?
Nothing should change. All comments are ignored during execution, just like the blank lines. So, you can use both to structure your code.
Let’s move on to Lesson 2 - Variables.
Complete code
At the end of each lesson, you will find the complete code for that lesson.
Click here to show the complete code from for this lesson
"""
This file contains the code for the python introduction of the Toolbox Workshop.
site: https://toolbox.pep-dortmund.org/introduction/python/

The included section is: Comments
"""

# Lesson: The first steps
print("Lesson 1")
# Subsection: Hello World!
print("Hello World!")  # prints the words Hello World! as an output
# print("Hello World!") <-- this line will be ignored